How to Use a Cricut DIY Hello Pumpkin Sign with Pumpkin SVG Free
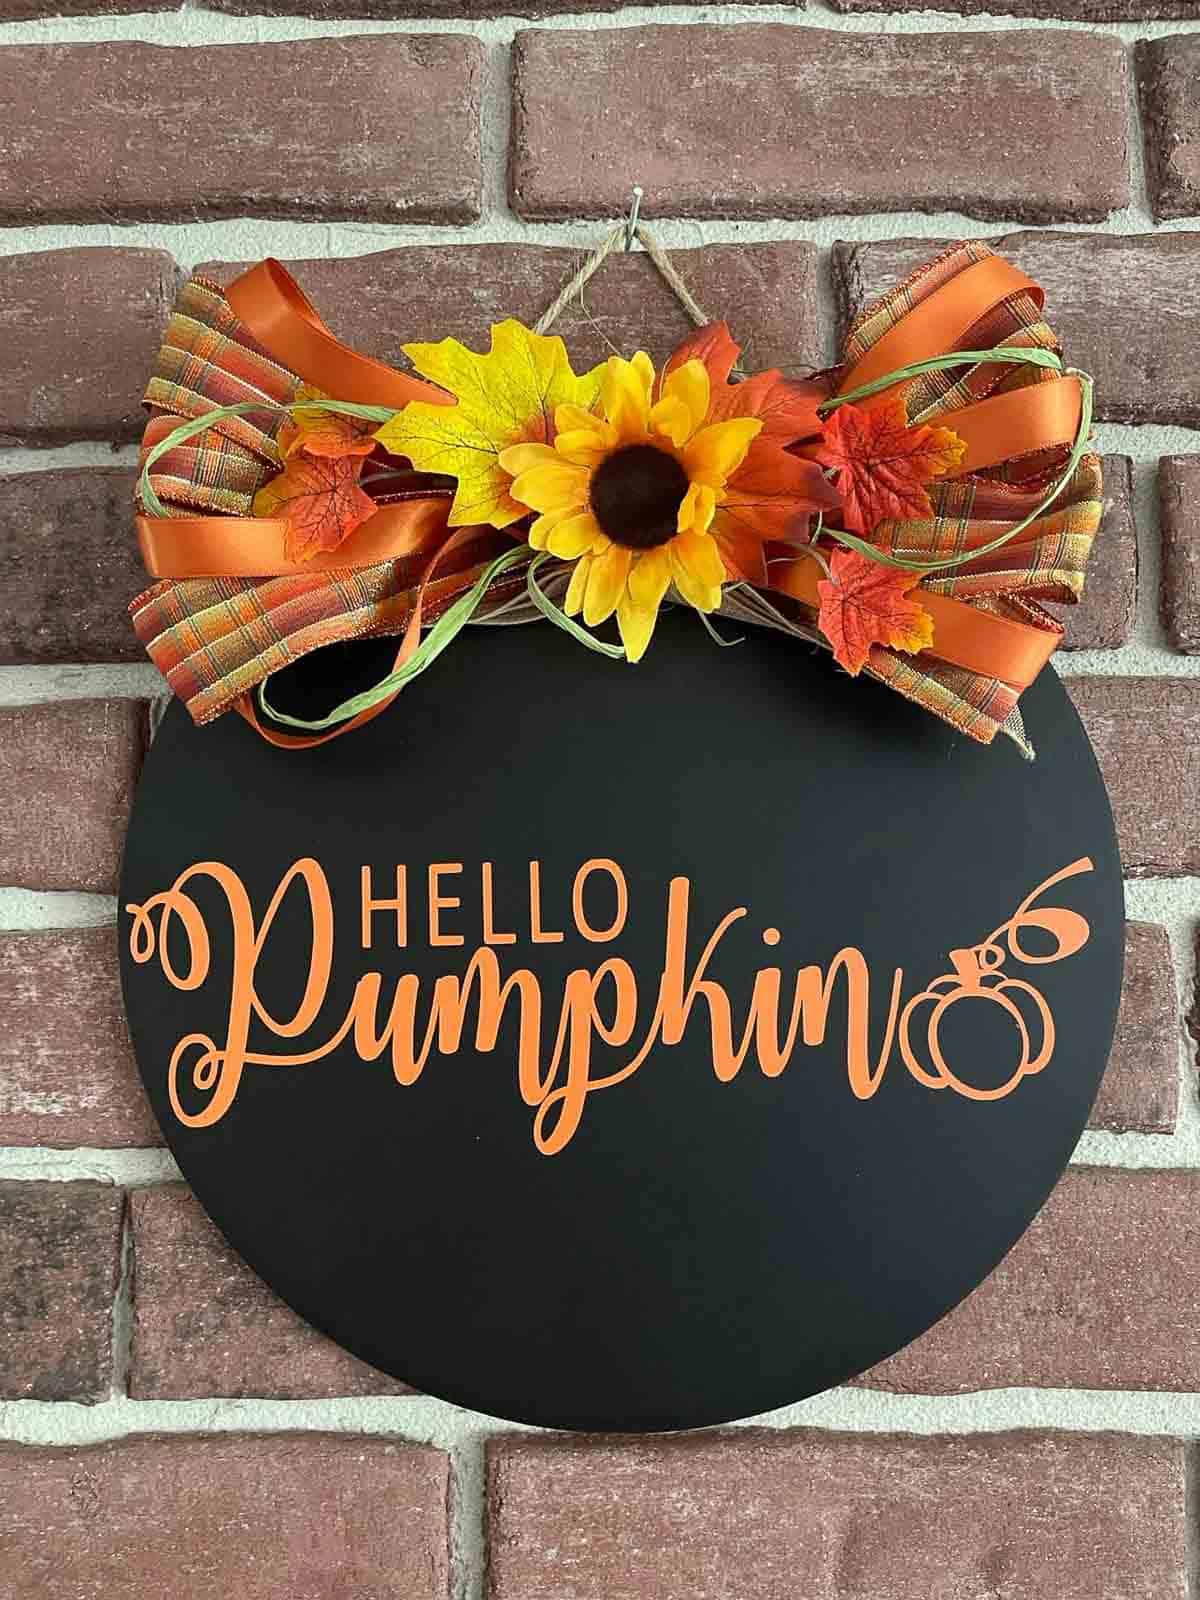
Learn how to use the Cricut to make a diy hello pumpkin sign and grab the hello pumpkin svg for free! This tutorial walks you through how to apply vinyl to a chalkboard or wood round and breaks it down into a beginner friendly project.
Post may contain affiliate links. As a member of the Amazon affiliate program, I may earn a small commision from qualifying purchases. To read my affiliate policy, click here.

Hello pumpkin.
You, yes, you. I’m talking to you of course.
I don’t know about you fellow food and craft aficionados but fall feels like my time to shine.
There’s nothing I enjoy more than the smell of pumpkin spice candles and crisp fall air and making tons of fall treats and decorations.
And OMG since I got my Cricut machine for Christmas my little pumpkin lovin heart has been aflutter with excitement thinking of all the crafts I can make.
But first, I had to sit down and learn how to use my Cricut which involved staring at in the box for a few weeks, figuring out how to use Design Space, and wrapping my mind around what exactly it can do.
And now it has clicked, I can really see the crafting possibilities are limitless!
The first Cricut tutorial I am sharing with you all, fittingly enough, is this DIY hello pumpkin sign and the free pumpkin design I designed for it.
What do you need to make a Hello Pumpkin sign with Cricut?

- Cricut machine– I have the Cricut Maker. You can use another model like an Explore Air, Explore Air 2, Explore 3 (in which case you can use smart materials and forgo the mat) and a Joy.
- Permanent vinyl– I like Cricut brand vinyl and used orange and white for different versions of this project.
- Standard grip mat– The green mat
- Weeding tools
- Transfer tape
- A sign/chalkboard– I found the chalkboards that I made these with in the dollar spot at Target for 3 dollars a piece. But you could use these wood rounds. Just see my note below the tutorial about prepping the wood for transfers.
- Burnishing tool– The flat square tool that helps you push down the vinyl onto the surface
- Ribbons and florals– Any fall ribbons would be cute and I just took apart some fall floral bushes to use in the bows.
- Hot glue gun and glue sticks– To apply the bow and florals.
How to Make It
1. Download the png here.
2. Open Cricut Design Space on your computer.
3. Upload the png.
Click on upload on the left hand side of the screen.

Select the file and upload it to design space.

You can choose simple for the select image type.

It will open the background remove dialogue. Because of the file type, the background will be transparent already so you don’t have to worry about it. Hit apply and continue.

In the next dialogue box, hit “Cut image.” Then hit continue.

Now add the file to the canvas by selecting the photo and choosing apply and continue.
4. Set up the project in Design Space.
When you first open the file in Design Space, it will be too big.

To fit onto a 12″ round surface make the dimensions
- width 11.263
- height 3.474

If you want, you can lay it out on a circle so you can see how it would look and change the settings as you like.
To do this, click on templates on the left hand side.
When the template menu opens, select basic canvas.

It will default to square or rectangle. From the top drop down box on the left hand side, select circle/oval.

Then drag the design in the circle template to where you want it to go so you can get an idea how it will look.
5. Set the vinyl up.
Click Make It in Design Space.

It will open a new screen that looks like this:

Then measure the vinyl and cut it.

Press it down onto your standard grip (green mat).

Click continue and make sure your Cricut is turned on.
6. Cut the vinyl.
Once the machine is connected, a new window will open and ask you to select your materials. Click popular.

A new screen will come up with selections. Choose vinyl.

After you select vinyl, a new screen will open. Your default tools should work, but if not, the screen will tell you exactly which tools you need.

Load the prepared mat into the machine, pressing the flashing load/unload button (double sided arrow).

Design Space will prompt you to click Go.

Then click the flashing go button (the Cricut logo) and the machine will start to cut your vinyl.
7. Unload the vinyl.
When the machine is done cutting the vinyl, your computer will tell you to unload the vinyl.
Just click the flashing double arrow button again and the machine will release your vinyl.

You will be able to see your design scored into the vinyl.
8. Weed the vinyl.
To weed the vinyl, I normally start with the pointy weeding tool and gently lift up an area.

This particular design is pretty easy to weed and most of it will peel off in one big sheet.

Once you have the majority of it weeded, go back and weed the details, like the spaces in the P, the O, and the pumpkin.

9. Apply the transfer tape.
Once you have it weeded, apply the transfer tape to your design by first cutting it to size.
Then remove the backing and of the transfer tape and firmly press it onto your design, which should still be on your cutting mat.
Take the burnishing tool (the square tool) and use it to push the tape onto the vinyl. Don’t be afraid to use lots of pressure.

You’ll notice that the grid on the transfer tape is scraping off and that’s is totally ok. Generally it means you are pressing hard enough.
10. Remove the vinyl from its backing on the mat.
Once the transfer tape has been firmly applied and burnished on, take the spatula tool and begin to wiggle it between the tape and the backing.
If the tape is firmly burnished on, the design should start lifting off with the tape.
11. Transfer the vinyl onto your base.
Line up the design onto the base sign.

Use the burnishing tool to firmly press the vinyl onto the sign so it sticks.
Use the spatula tool to help you begin to lift the tape off the sign.
Lift it slowly, working in one direction.

If you find pieces of vinyl are lifting off the sign and sticking to the tape, just press the tape and vinyl back down onto the sign and burnish that area.

Then continue peeling the tape away from the sign until you’ve removed the tape, leaving just the vinyl behind on the sign.

12. Decorate as you like.

Embellish the sign with a pretty bow and florals.
Can I follow the same directions to make a sign on a wood round?
Sort of but you have to stain or paint the wood, let it cure, and then seal the wood with water based sealant before you apply the vinyl. You should wait at least 24 hours after applying the last coat to apply the vinyl.
What grip mat do I need to cut permanent vinyl?
I use the standard grip (green) mat for permanent vinyl.
Tips and Tricks

- Don’t worry if the vinyl doesn’t lift off of the backing right away with the transfer tape. Press it down more and lift slowly.
- Make sure you don’t forget to weed the inside of the letters and the pumpkins.
- Play with your embellishments- you can keep it simple or get creative and add things I didn’t think of!
Other Fall Decor and Fall Food Crafts You Might Enjoy
How to Use a Cricut DIY Hello Pumpkin Sign
Equipment
- Cricut machine
- Standard grip mat
- Weeding tools
- Transfer tape
- Burnishing tool
Materials
- Permanent vinyl in white or orange
- A sign/chalkboard
- Ribbons and florals
- Hot glue gun and glue sticks
Instructions
- Download the jpeg here.
- Open Cricut Design Space on your computer.
- Upload the jpeg.
- Set up the project in Design Space.
- To fit onto a 12" round surface make the dimensions 11.263" wide by 3.474" high
- Measure and cut the vinyl.
- Press it down onto a standard mat.
- Follow the machine prompts to select the material (vinyl) and click make it.
- Press the flashing double arrow button and to load the mat and vinyl into the machine.
- Now click the flashing go button and the machine will cut the vinyl.
- Once it’s done, click the flashing load/unload button to unload the mat.
- Weed the excess vinyl off leaving the design attached to the backing. Do not remove it from the mat.
- Measure and cut a piece of transfer tape. Remove the backing and burnish it onto the cut vinyl.
- Once the transfer tape has adhered to the vinyl, carefully peel the tape and the vinyl away from the backing.
- Line the transfer tape up on your round. When you are happy with where it is positioned, make sure the sticky side of the tape is down and the design is right side up.
- Press down the design firmly, using a burnishing tool to really rub the vinyl on.
- Peel off the transfer tape slowly.
- Add a bow and florals of your choosing to decorate the sign.
- Display!


