Showgirl Star Sugar Cookies
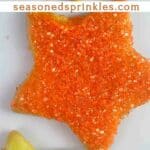


Calling all Swifties! Celebrate TS12’s release with these star-studed Showgirl sugar cookies – a must make for listening to the new album and feeling like a sparkling star. Based on the stars shown in between her initials, these star sugar cookies are perfect for ushering in a new era.
Post may contain affiliate links. As a member of the Amazon affiliate program, I may earn a small commision from qualifying purchases. To read my affiliate policy, click here.
Whatever is about to happen on The New Heights podcast, I am here for.
This is my Superbowl, people.
I have clowned.
I was convinced something was gonna happen in May.
Nope.
But boy did I have fun theorizing.
And I have been absolutely beside myself since mid July when Taylor Nation started with the countdown, count up situation.
I was so there for the teaser on Monday from Taylor Nation and the podcast announcement.
I stayed up for the 12:12 countdown and watched the website crash.
My daughter has made us friendship bracelets.
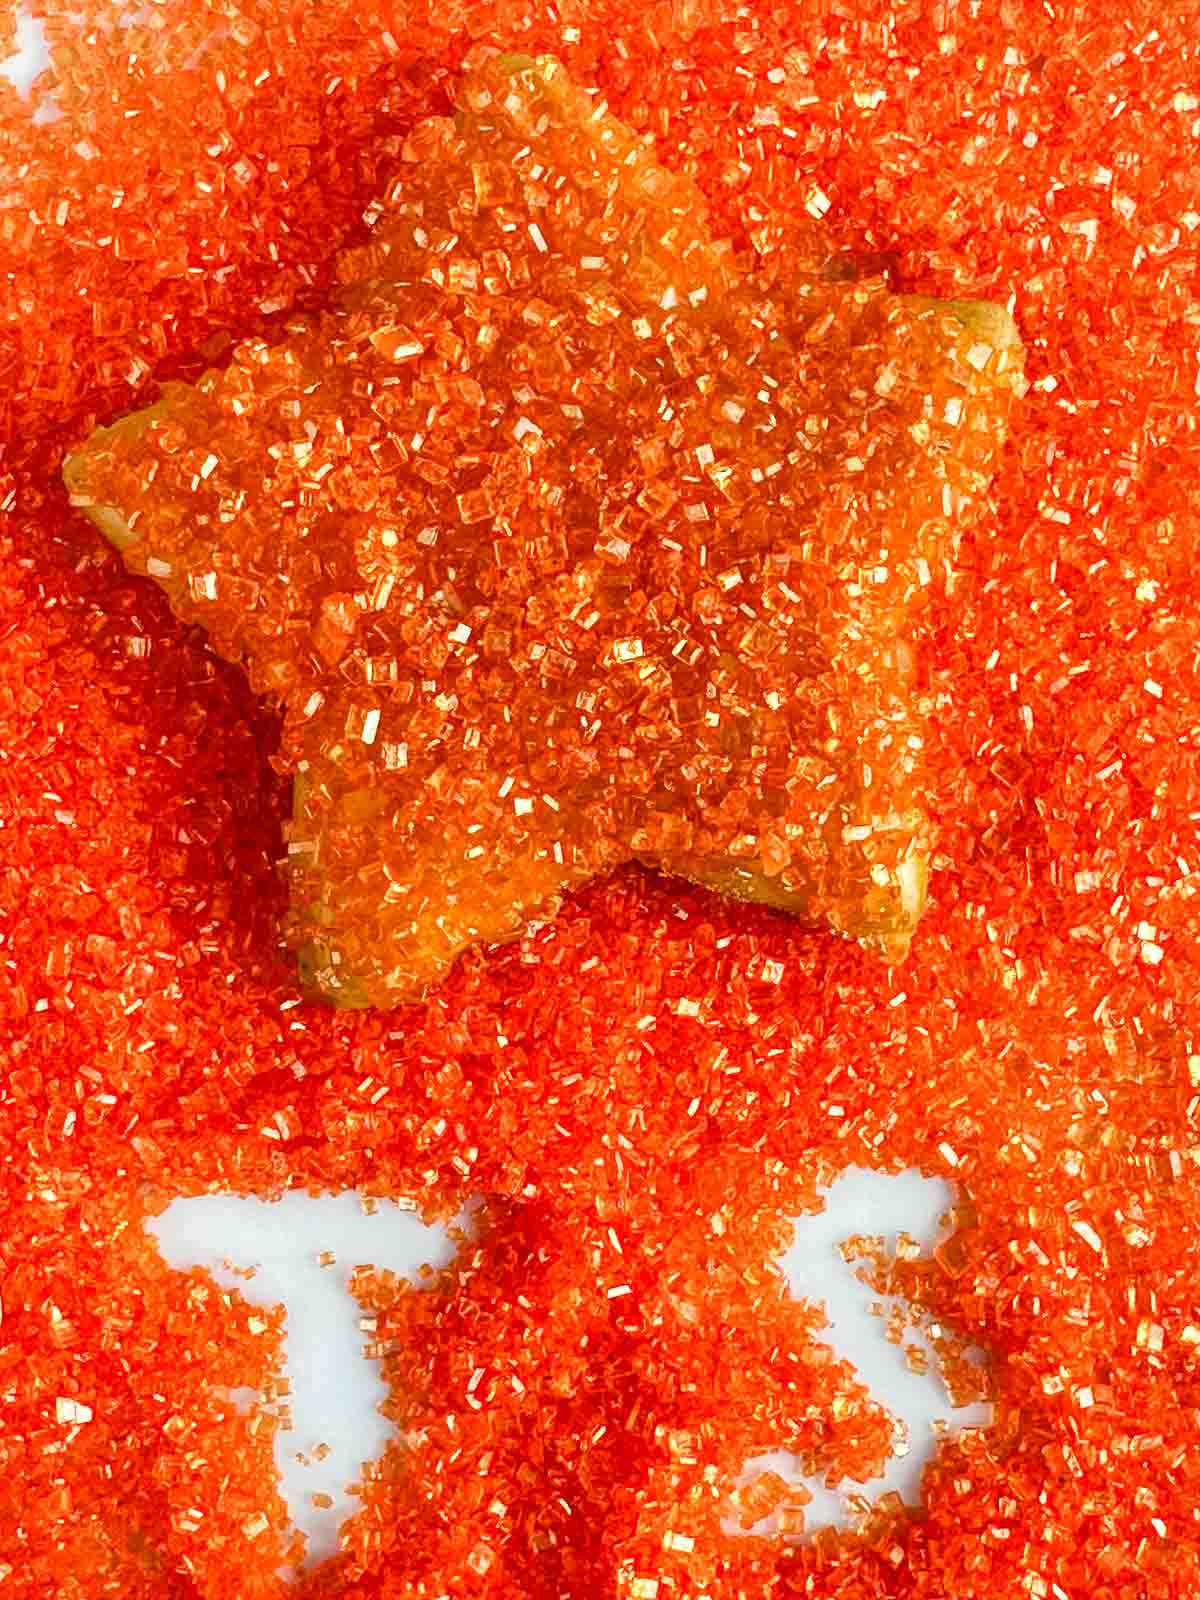
And now, I’m making you star sugar cookies inspired by the Life of a Showgirl and the stars in the T.S. logo.
They are glittery, buttery, and full of orange sanding sugar perfect for ushering in this new era and celebrating TS12 with sparkle, pizzazz, and snacks.
Ingredients and Kitchen Supplies

Here’s what you need to make Showgirl star sugar cookies:
- Butter– At room temperature, don’t melt it and don’t use it cold!
- Sugar– Plain old granulated sugar gives these Showgirls some sweetness.
- Egg– At room temperature, so leave that one out for a bit to chill with the butter.
- Vanilla– Use pure vanilla extract over imitation for the best flavor.
- Flour– You want to use all purpose flour, though you can probably sub in gluten-free.
- Baking powder
- Salt
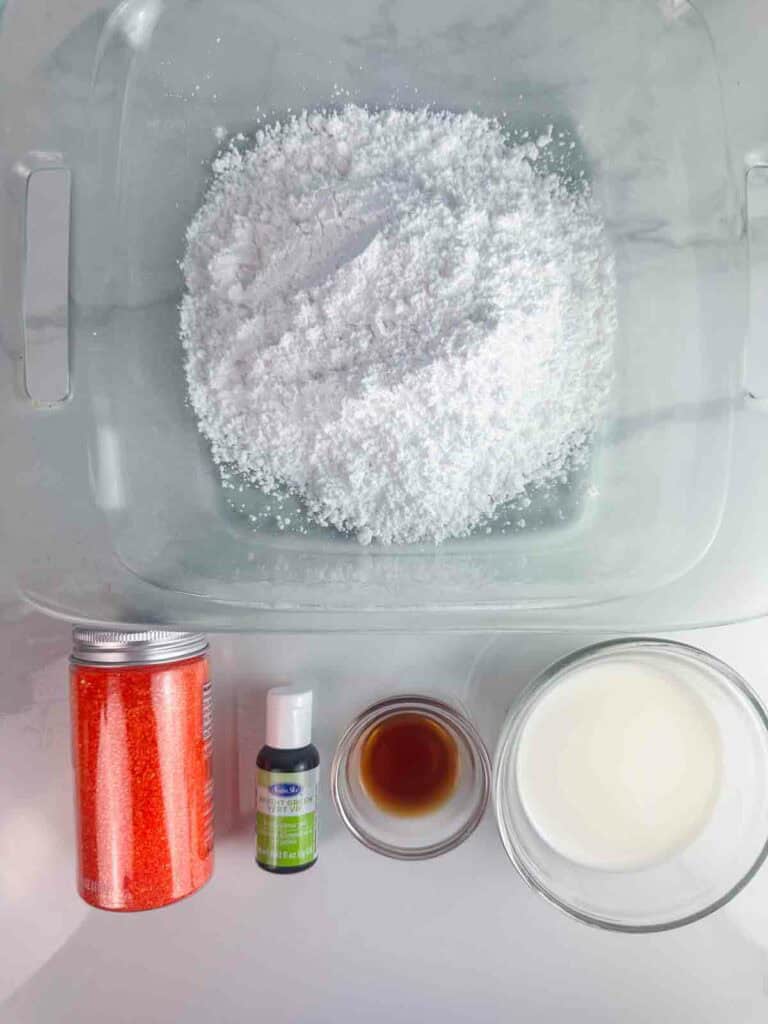
For the icing, you’ll want:
- Powdered Sugar – You don’t want to use granulated because it will get gritty.
- Milk or Cream – No real preference for these.
- Maple syrup – You could use honey or another sweet syrup.
- Decorating materials – We got ourselves some green food coloring and orange edible. glitter. In a pinch, you an dress these Showgirl cookies down a bit with orange sprinkles.
For kitchen supplies, these will make it easier:
- Cookie sheets
- Stand mixer or high power hand mixer
- Measuring cups and spoons
- Spatula
- Parchment paper
- Rolling pin
- Cookie cutters
How to Make Showgirl Star Sugar Cookies
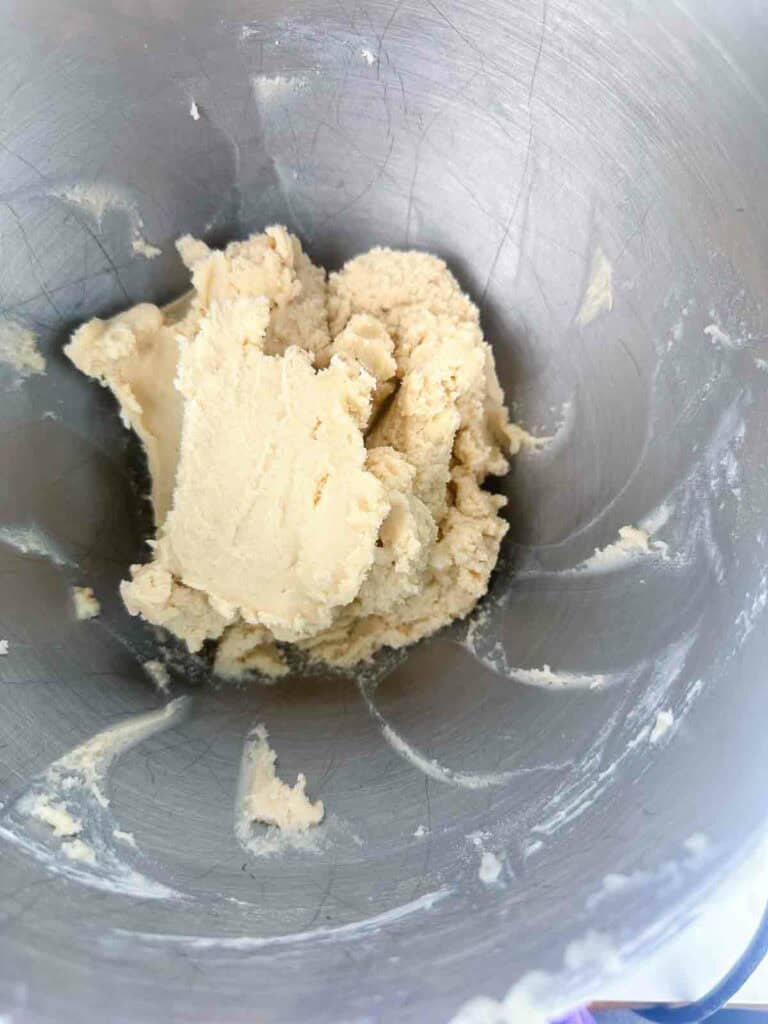
1. Cream together the butter and sugar.
Beat the butter and sugar together on high speed in a stand mixer fitted with the paddle attachment until the butter and sugar become completely smooth, light, and fluffy.
Once the butter is light and fluffy, beat in the egg and vanilla on high speed until combined.
Scrape down the sides and bottom of the bowl as needed.
2. Whisk together the dry ingredients.
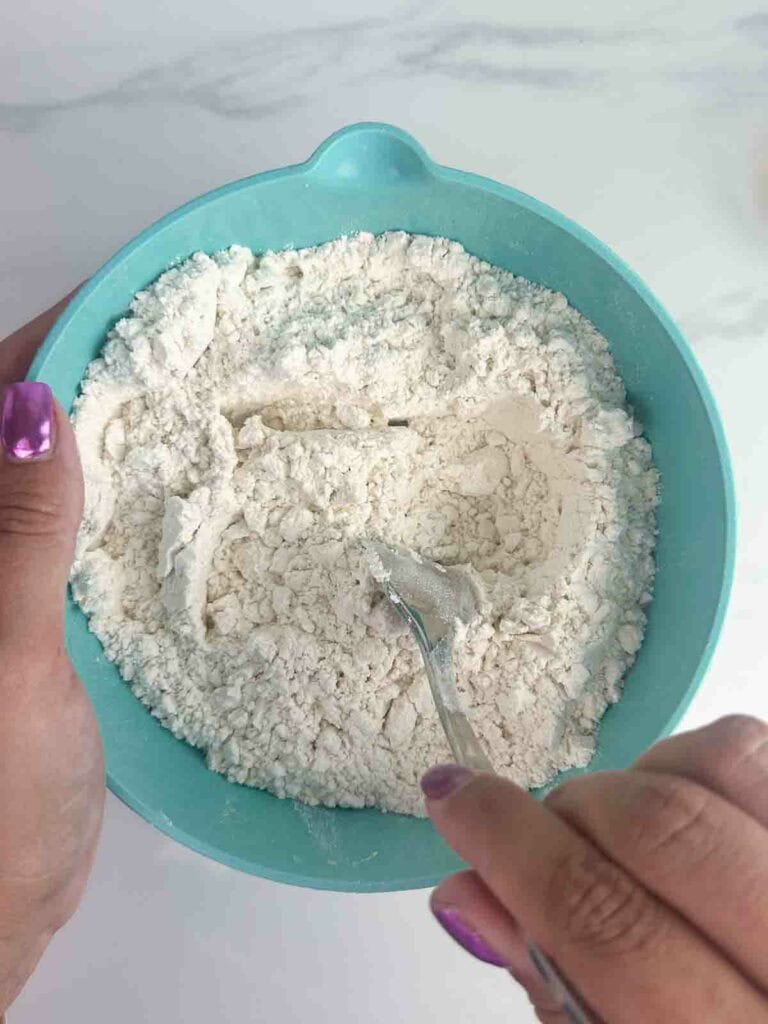
Whisk the flour, baking powder, and salt together in a medium bowl.
3. Add the dry ingredients to the wet ingredients.
Add half of the dry ingredients to the bowl of wet ingredients and mix together on low until incorporated.
Once the first half of the dry ingredients is incorporated, add the second half and mix again until combined.
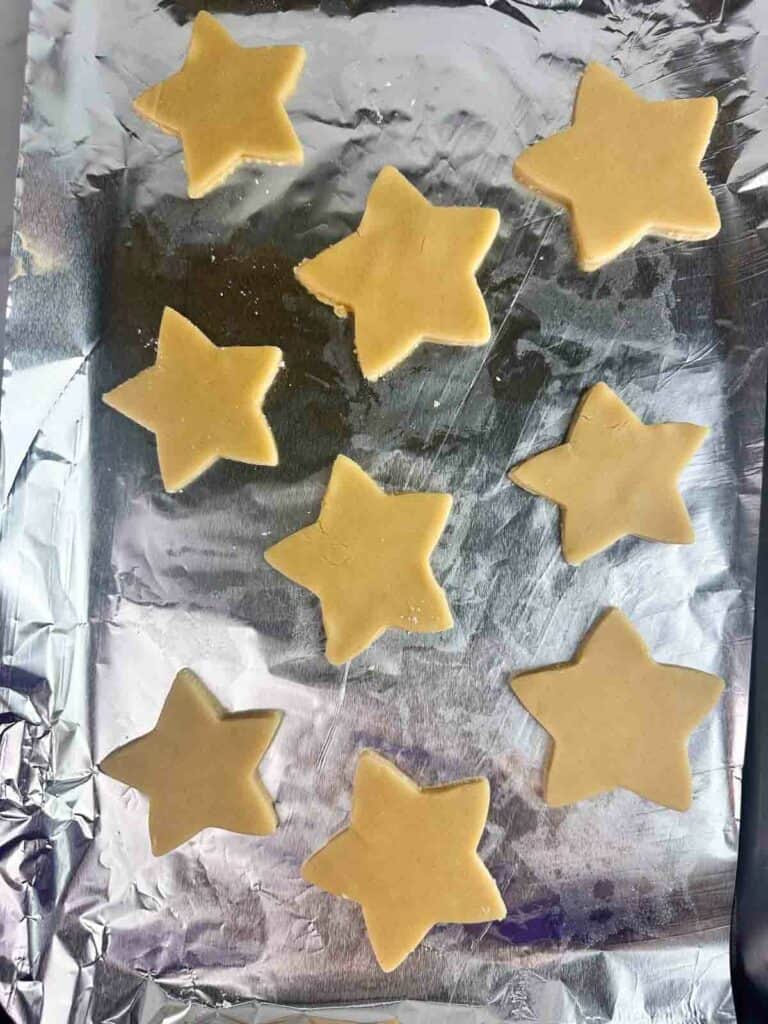
4. Roll out the dough and cut out cookies.

Divide the dough into 2 roughly equal parts.
Take one portion of dough and place it in the center of a floured piece of parchment paper.
Press it down a bit and add a little more flour on top of the dough.
Place another sheet of parchment over the dough, pressing it down a bit more.
Roll out the dough until it is about 1/4 inch thick.
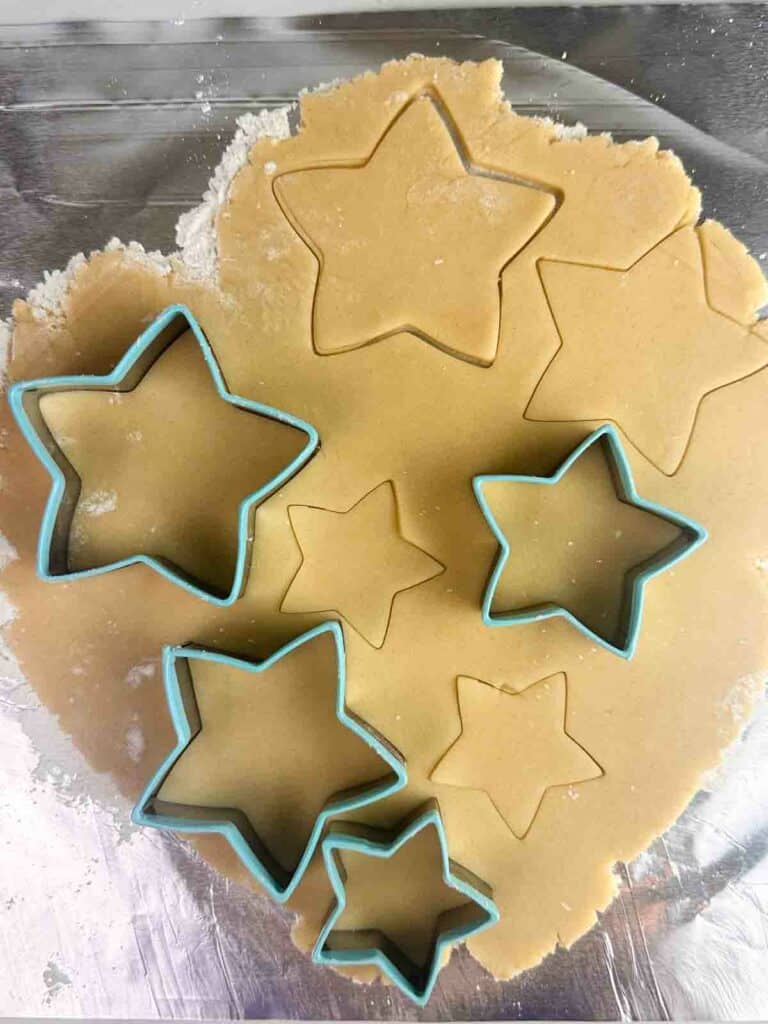
Cut out the cookies using star shaped cookie cutters and place them on a baking sheet lined with aluminum foil.
Repeat this with the other dough ball and any dough scraps you have.
Remember, you can use the scraps to make more cookies.
5. Refrigerate the star-shaped cookies.
Cover the trays of cut out cookies and refrigerate them for 2 to 4 hours.
Do not skip this step so the cookies hold their shape as they bake!
6. Bake and cool.
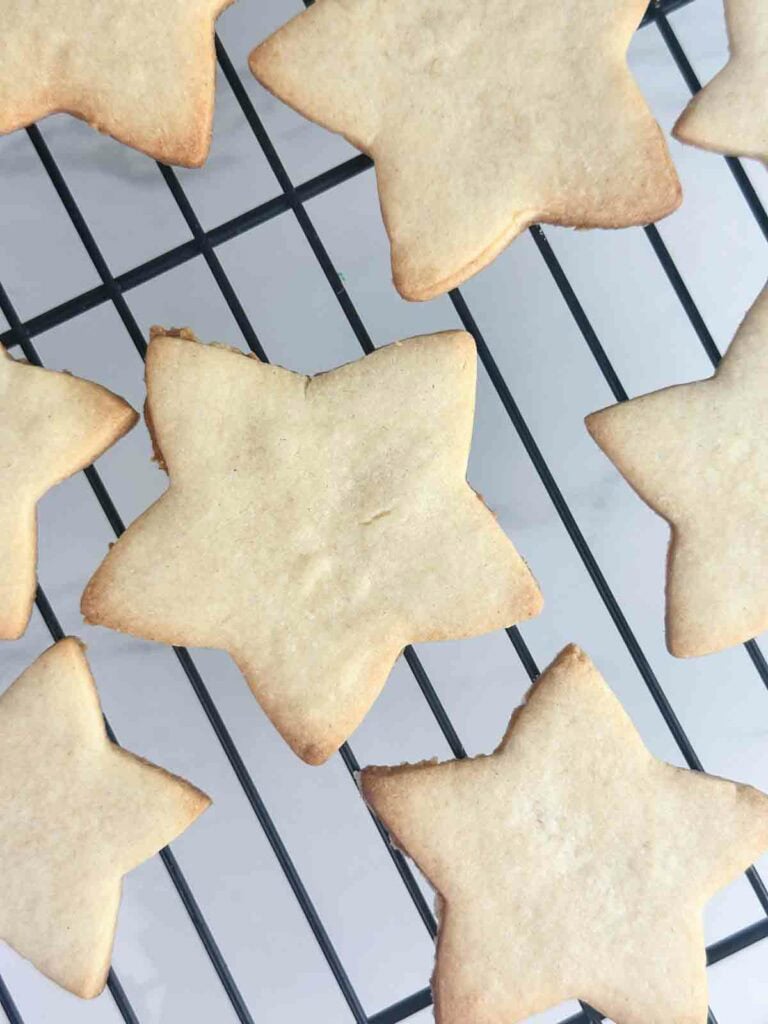
After the cut out cookies have chilled, bake them at 350 degrees for 10 to 12 minutes or until they are lightly golden.
Remove from the oven and let cool for 5 minutes before transferring to a cooling rack to let them cool completely.
How to Make the Icing and Decorate the Showgirl Sugar Cookies
1. Make the icing.
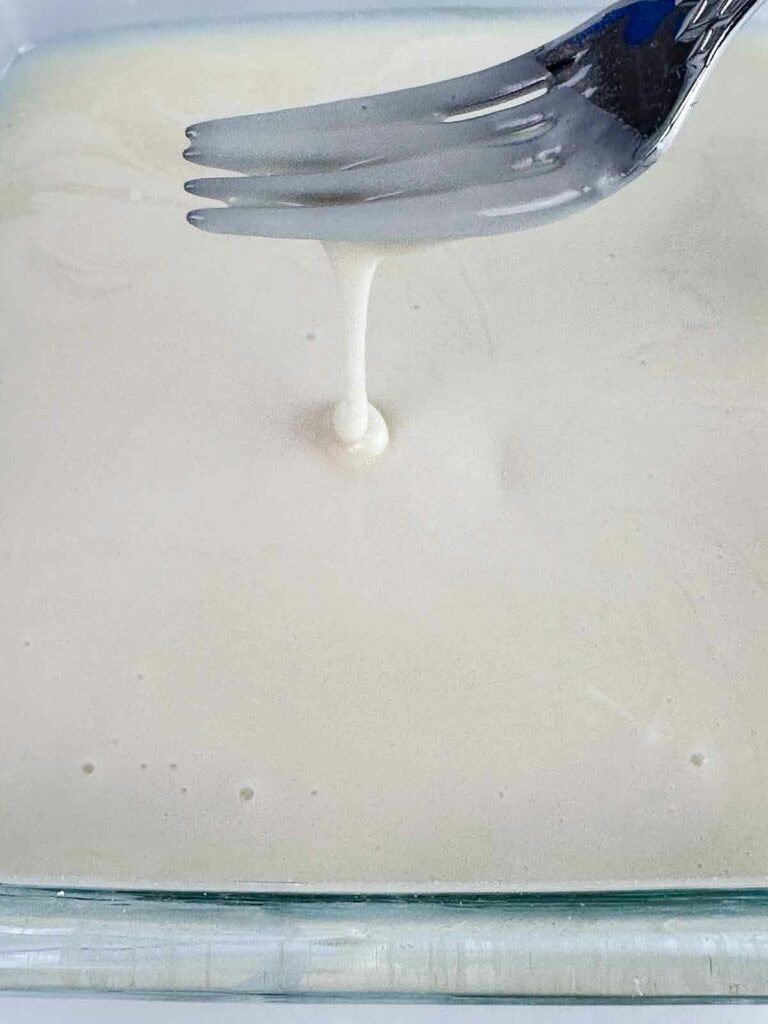
In a shallow wide bowl or dish stir together the powdered sugar, milk or cream, and maple syrup until it reaches a consistency where the icing will smooth itself out slowly if you let it drip it the bowl of icing.
If the icing is too thick, add half a tablespoon of milk until it reaches the right consistency.
If it is too thin, add a little more powdered sugar.
2. Add in the food coloring.
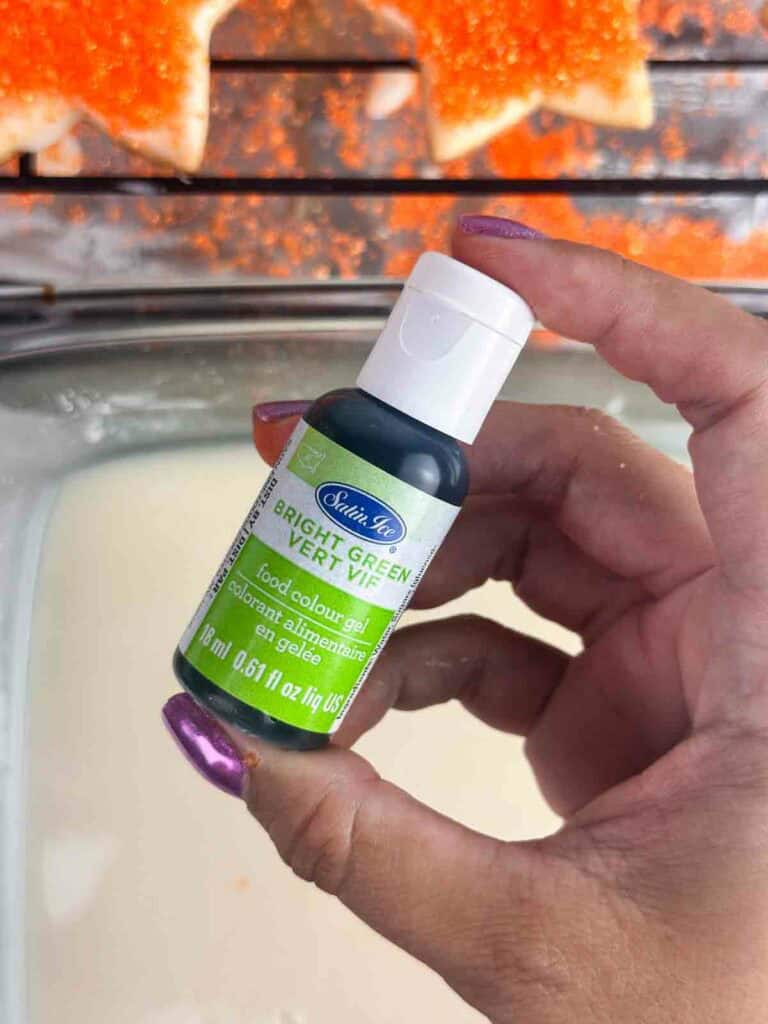
On top of the icing’s surface, scatter drops of green food coloring.
We dotted 3 dots throughout the top of the icing.
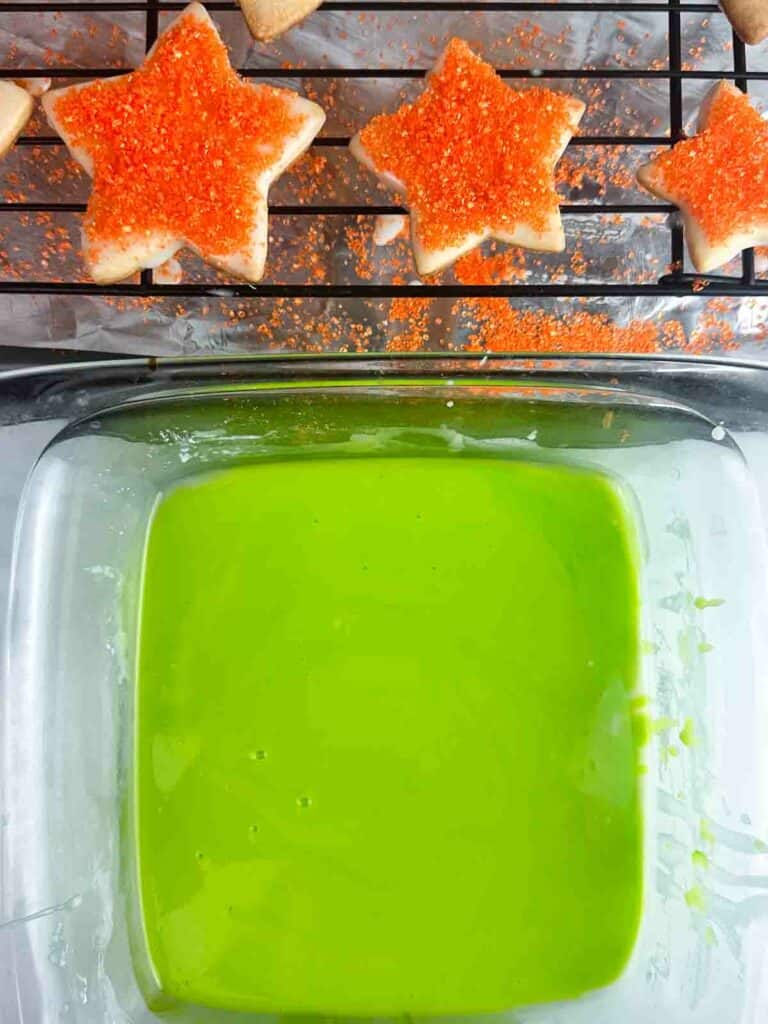
Once you’ve dolloped the food coloring onto the surface of the icing, take a fork and mix it to make a solid color.
3. Dip the cookies in the icing.
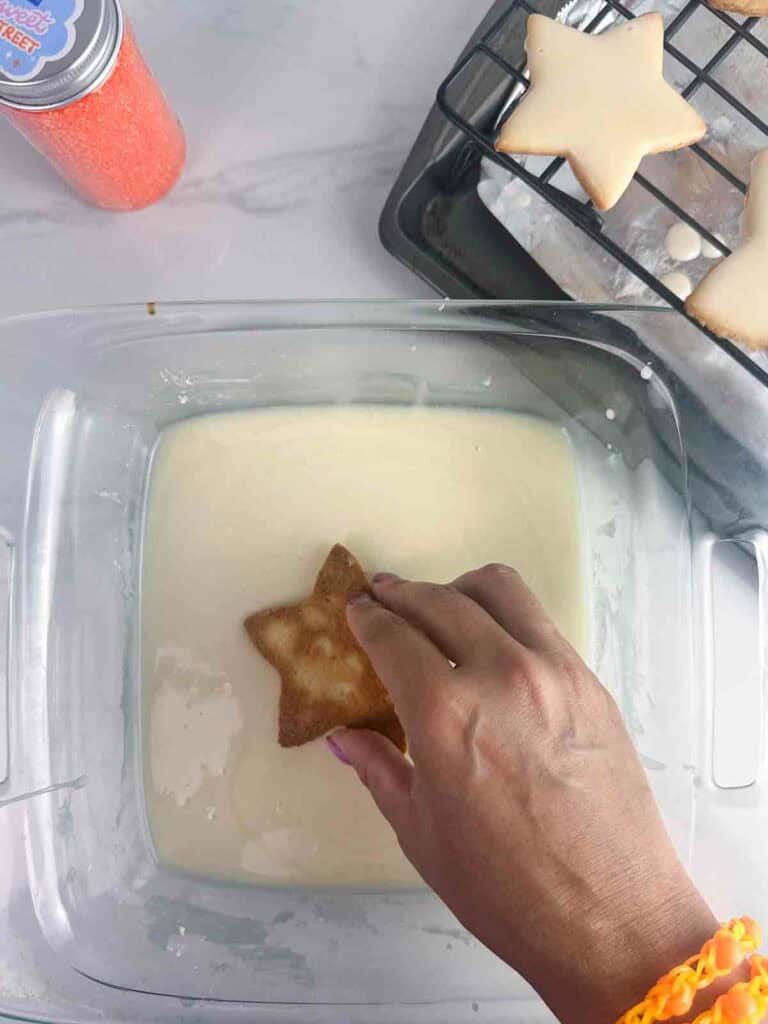
Take one baked cookie and dip the top of the cookie into the icing so the cookie is flat in the icing.
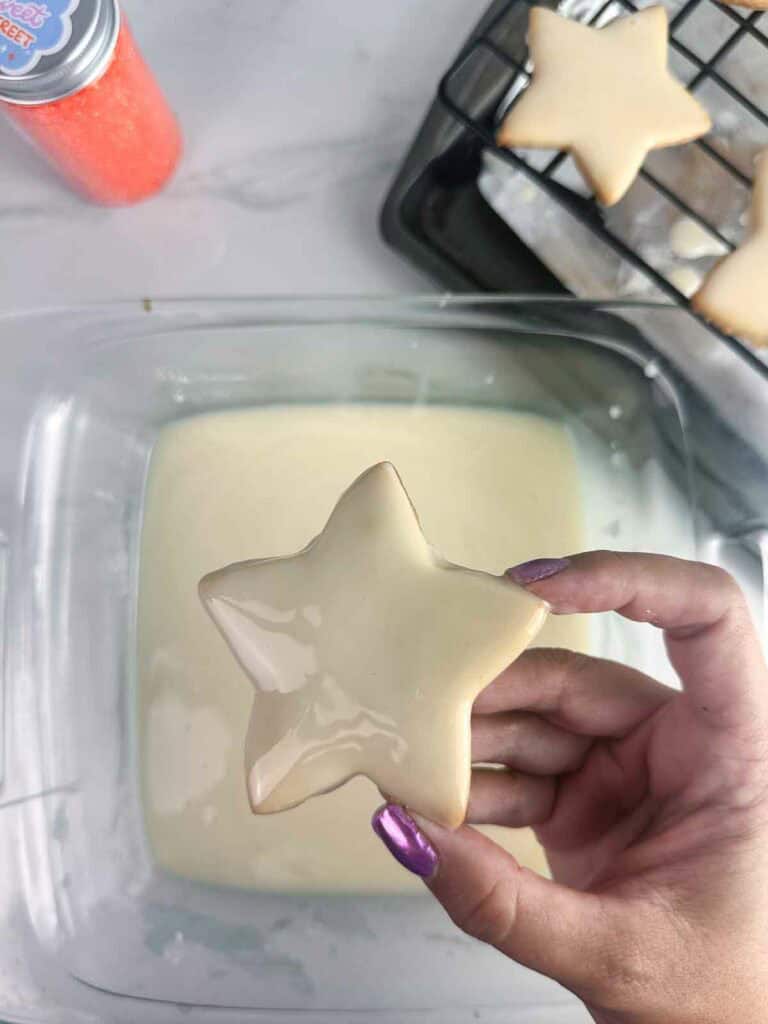
Gently remove the cookie, letting the excess icing drip off into the bowl.
Put the cookie on a cooling rack above foil so clean up will be easy.
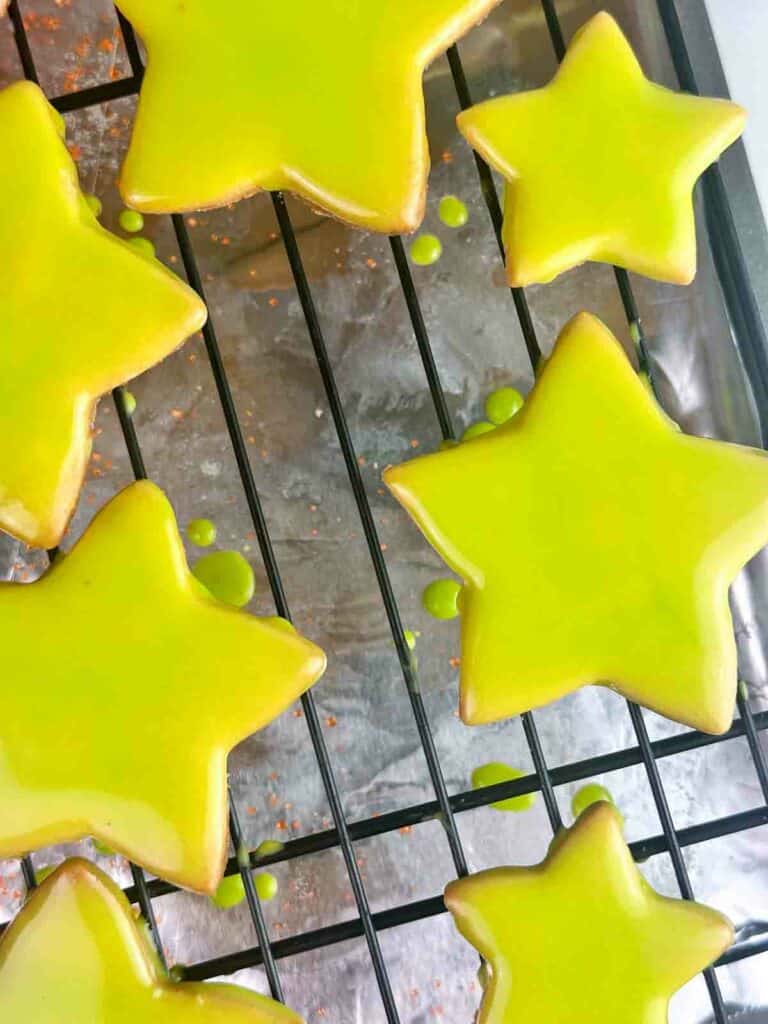
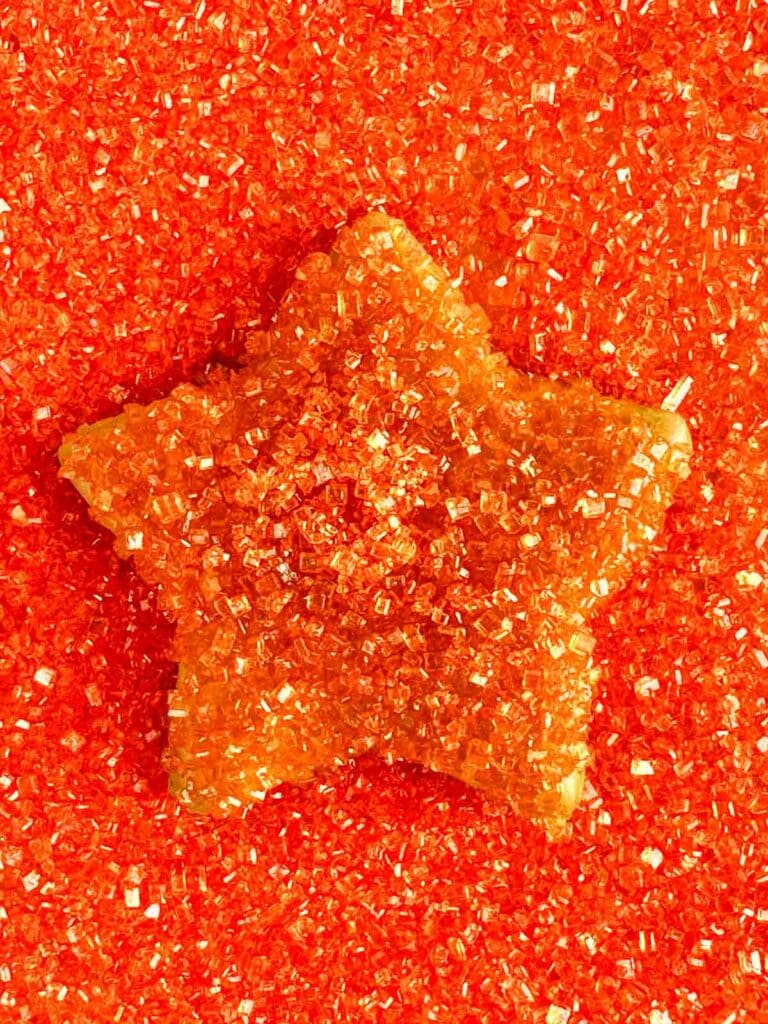
4. Add sprinkles and let set.
Once you’ve dipped all the cookies and they are all on the cooling racks above the sheets of foil, decorate them with sprinkles if you’d like.
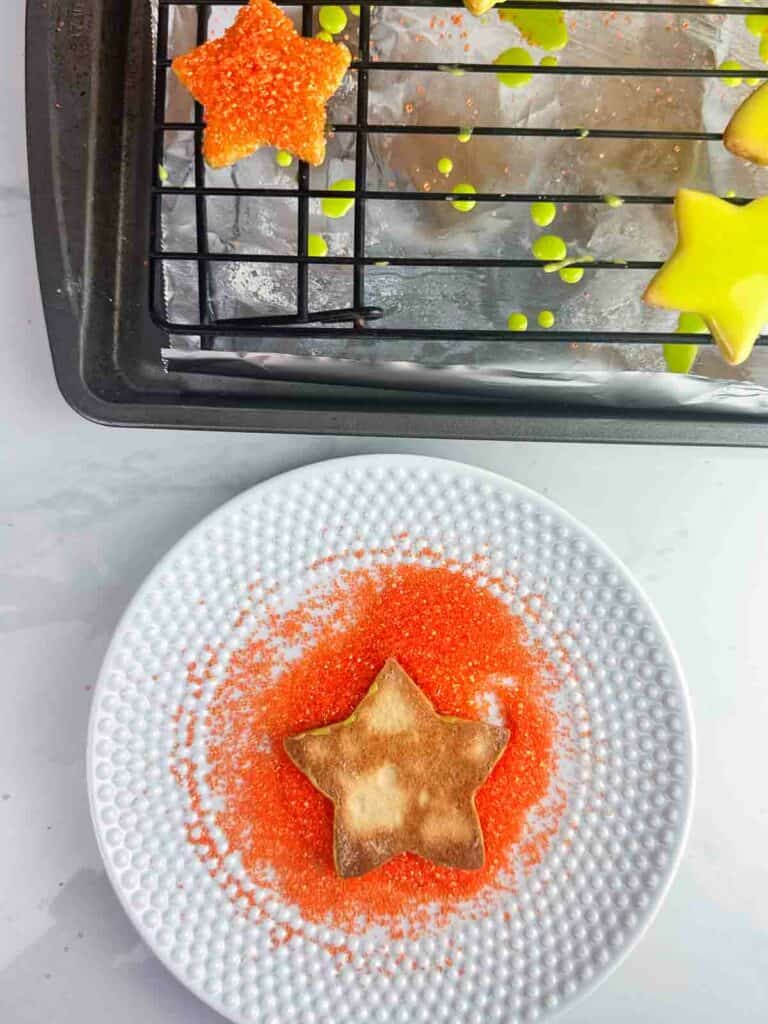
I poured orange sanding sugar (basically edible orange glitter) into a shallow plate and dipped the iced cooking in it.
Pull it up and shake the excess sugar off.
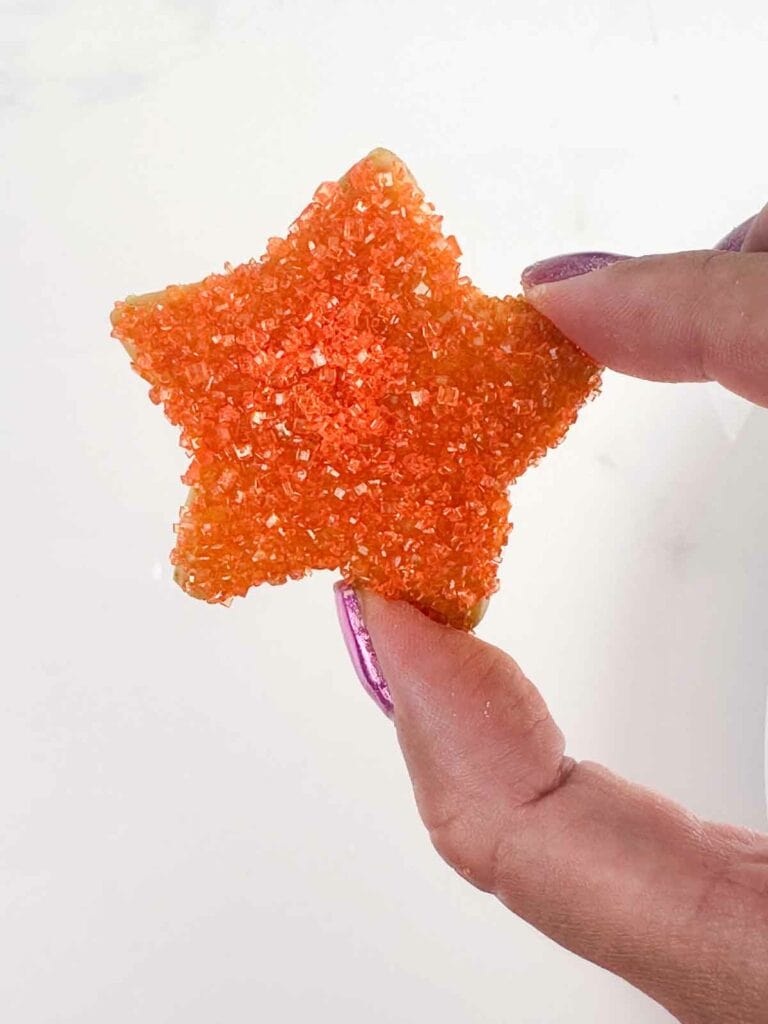
Keep in mind this kind of icing doesn’t hard set for about 2 days.
It will be soft set and the sprinkles will help make it not super gooey.
Enjoy!
Serving

I don’t know about you, but I plan to make these the day TS12 drops.
So, yeah, there’s that.
After TS12 comes out, you can certainly make them whenever you like and decorate them to match whatever occassion you like!
Storing
You can certainly make these Showgirl sugar cookies ahead of TS12’s launch.
They should store in an air tight container for about 5 to 7 days.
You can also make the cookie ahead and then making the icing the day you plan to serve them if you prefer.
Tips and Tricks
- Chilling sugar cookie dough is key to making fun shapes out of them. In order for them to hold their shape when baking, they need to chill for a while.
- You can color the cookies, but when they bake, the color in the dough tends to change. We find it best to use coloring in the icing so you can get the color the way you like it.
- Make sure the cookies are fully cooled before adding the icing. The icing is very thin to begin with, so using warm cookies will make it much more runny and cause it to run right off the cookies.
- Add a bigger Swiftie touch by adding chai spices to the dough.
- Making these for a different occassion? You can use different colors for the glitter and icing to fit whatever the occassion. Christmas, Halloween, and other holidays can all use star shaped sugar cookies.
Other Sugar Cookie Recipes
Looking for other sugar cookie recipes? Try these:
- Easy and Adorable Unicorn Sugar Cookies
- Pumpkin spice sugar cookies
- The Cutest St. Patrick’s Day Sugar Cookies
- Store Bought Sugar Cookie Dough Hacks: Dipped Sugar Cookies
Love Taylor-inspired Style?
If you love Taylor-inspire style, you should check out this shimmering orange heart necklace. It is the perfect gift for the Taylor fans in your life.

Did you make this? Let me know!
Did you make these Showgirl Star Sugar Cookies or any other recipe on my site? Leave me a comment below and let me know how you liked it.
Make sure you follow along with me on Facebook, Pinterest and Instagram to see everything we’ve got going on.
Stay in the know! Sign up for our newsletter that contains the latest recipes and tips.
Ingredients
For the cookies
- 3/4 cup unsalted butter (at room temperature)
- 3/4 cup granulated sugar
- 1 egg (at room temperature)
- 2 teaspoons vanilla extract
- 2 1/4 cups all purpose flour
- 1/2 teaspoon baking powder
- 1/8 teaspoon salt
For the Icing
- 2 cups powdered sugar
- 4-6 tablespoons milk
- bright green food coloring
- orange glitter sprinkles
Instructions
- Cream together the butter and sugar.Beat the butter and sugar together on high speed until completely smooth and light and fluffy in a stand mixer fitted with the paddle attachment.
- Once the butter is light and fluffy, beat in the egg and vanilla on high speed until combined. Scrape down the sides and bottom of the bowl as needed.
- Whisk the flour, baking powder, and salt together in a medium bowl.
- Add half of the dry ingredients to the bowl of wet ingredients and mix together on low until incorporated.
- Once the first half of the dry ingredients is incorporated, add the second half and mix again until combined.
- Divide the dough into 2 roughly equal parts. Take one portion of dough and place it in the center of a floured piece of parchment paper. Press it down a bit and add a little more flour on top of the dough. Place another sheet of parchment over the dough, pressing it down a bit more.
- Roll out the dough until it is about 1/4 inch thick.
- Cut out the cookies and place them on a baking sheet lined with aluminum foil. Repeat this with the other dough ball and any dough scraps you have that you can roll out to make more cookies.
- Cover the trays of cut out cookies and refrigerate them for 2 to 4 hours.
- After the cut out cookies have chilled, bake them at 350 degrees for 10 to 12 minutes or until they are lightly golden.
- Remove from the oven and let cool for 5 minutes before transferring to a cooling rack and letting them cool completely.
- When the cookies are coole and you are ready to decorate them, make the icing. In a shallow wide bowl or dish stir together the powdered sugar, and milk or cream until it reaches a consistency where the icing will smooth itself out slowly if you let it drip it the bowl of icing.
- On top of the icing's surface, scatter drops of bright blue food coloring. Once you've dolloped the food coloring onto the surface of the icing, take a fork and gently swirl the food coloring so it makes swirls but does not completely mix together.
- Take one baked cookie and dip the top of the cookie into the icing so the cookie is flat in the icing. Turn the cookie by about 1 to 2 1/4 of a turn keeping the cookie flat in the icing so the icing swirls more. Gently remove the cookie, letting the excess icing drip off into the bowl. Put the cookie on a cooling rack above foil so clean up will be easy if extra icing drips off the cookies as they set.
- Once you've dipped all the cookies and they are all on the cooling racks above the sheets of foil, decorate them with the orange glitter sprinkles. Let the cookies set. The icing takes about a full day to fully harden but will be soft set after about 2 hours. Enjoy!