Homemade Pie Crust Recipe


Our homemade pie crust recipe teaches the non-baker how to make a tasty, flaky crust at home. Our traditional pie crust was born to hold apple pie, but it is versatile enough to use for pot pies, fruit pies, and any other recipe that uses pie crust.

Post may contain affiliate links. As a member of the Amazon affiliate program, I may earn a small commision from qualifying purchases. To read my affiliate policy, click here.
Pie crust is totally intimidating as a beginner baker.
Actually making a homemade pie crust recipe isn’t nearly as hard as you think.
It only needs a few ingredients and using a food processor brings the dough together quickly.
And the result of this all butter pie crust recipe?
A homemade pie crust I keep coming back to that’s rich, flaky, and full of flavor.
I use it every holiday and it never lasts long once the pie hits the table.
Ingredients and Kitchen Supplies
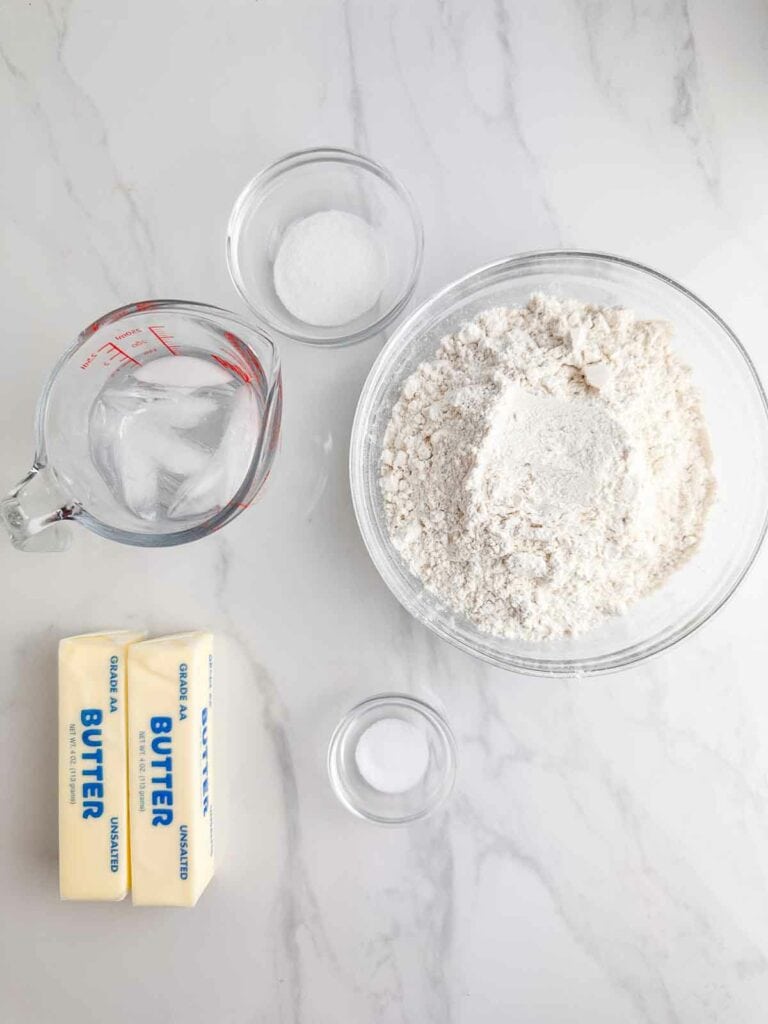
Here’s what you need to make our homemade pie crust recipe:
- All-Purpose Flour – You want to avoid speciality flours, like bread flour. We have not tested it with gluten-free, so it may or may not work with these varieties.
- Butter – Some crusts use shortening, but this one uses all butter for best flavor. Make sure it’s nice and cold to create that flaky texture.
- Salt – You want a bit of salt to help bring out the flavors.
- Sugar – If you want to make a more savory pie, like a chicken pot pie, you can omit the sugar. You can also keep it for a bit of sweet and savory mix.
- Ice Water – You want to use cold water to help keep the crust cooler when working with it which helps develop those steam pockets.
For equipment, you will want:
- Food Processor – Don’t worry, you can do this without a food processor. This tool just makes it a lot easier.
- Rolling Pin
- Pie Tin – If making a traditional apple pie. If you want to make something like our pumpkin hand pies, you won’t need a pie tin.
- Measuring Spoons and Cups
How to Make Our Homemade Pie Crust Recipe
We have two ways to make the pie crust recipe at home: with or without a food processor.
Pie Crust with a Food Processor
1. Combine first part of dry ingredients with the butter.
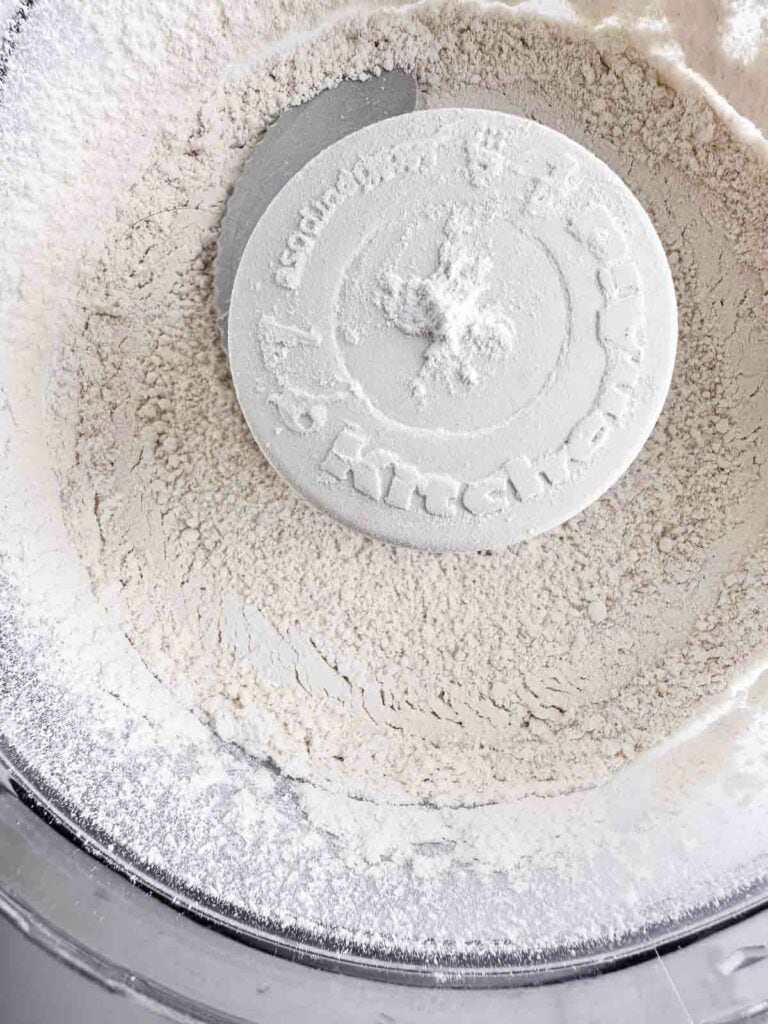
Add 1.5 cups of flour, sugar, and salt to the food processor and pulse a few times to combine.
Cube up cold butter and scatter it across the top of the flour mixture.
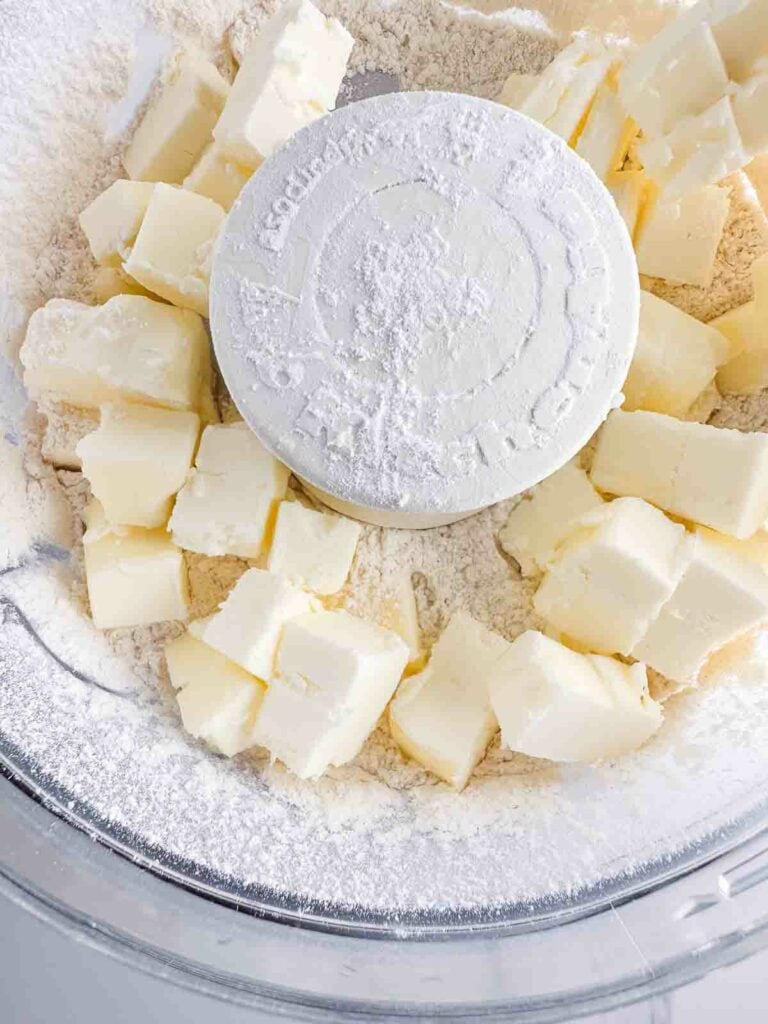
Process for about 15 to 20 seconds or until the flour and butter start to form little clumps.
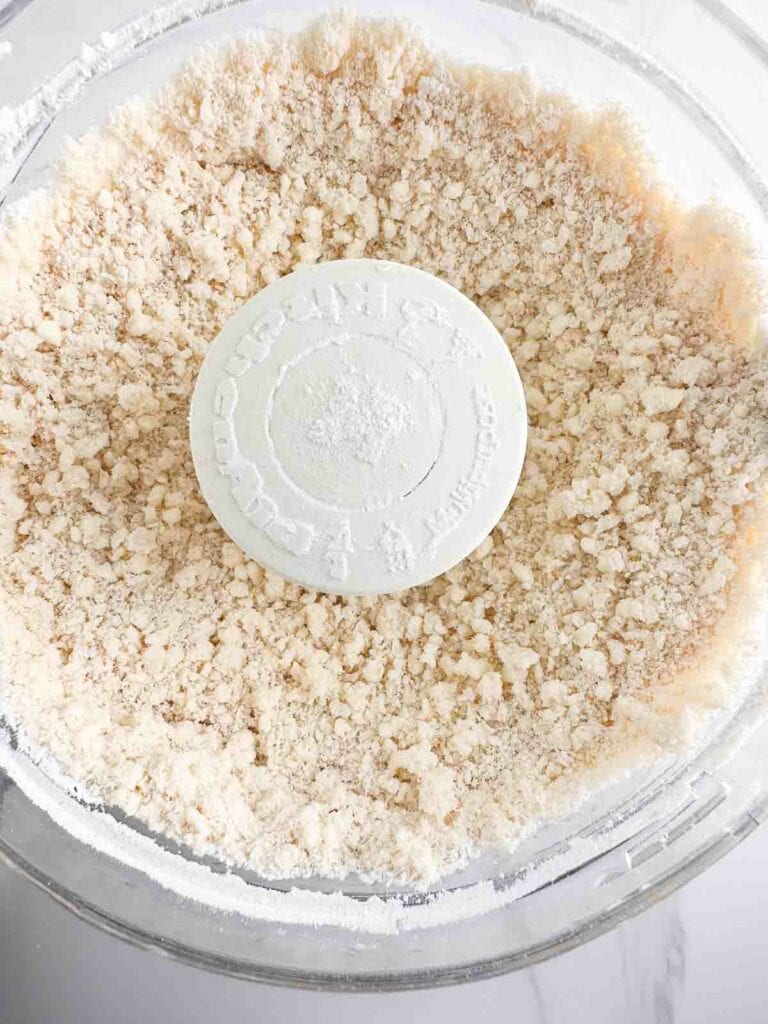
There should not be any dry, uncovered flour left in the bottom when it is ready.
You should notice that the flour has a pale yellow color and should press together easily.
2. Add in the remaining flour.
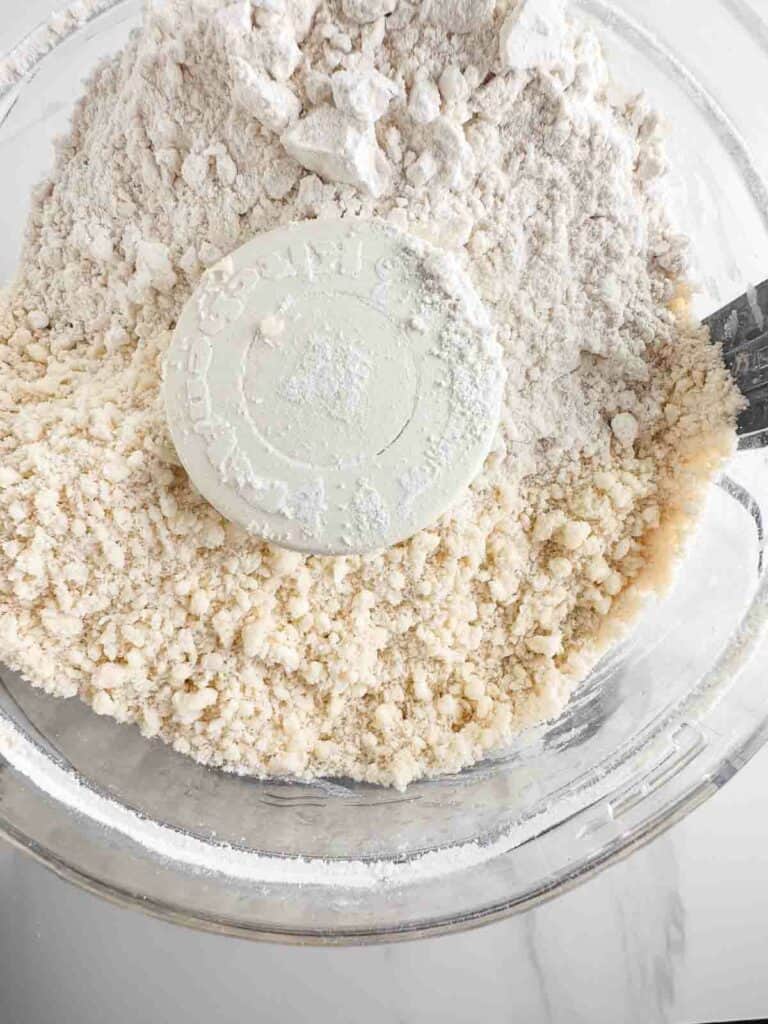
Use a spatula to scrap down the sides of the food processor bowl.
Add in the remaining cup of flour and pulse about 4 to 5 times or until the dough breaks up and feels crumbly.

The flour should be pretty evenly distributed at this point and in larger buttery clumps.
3. Combine the water to bring the dough together.
Remove the pie dough from the food processor and place it in a medium mixing bowl.
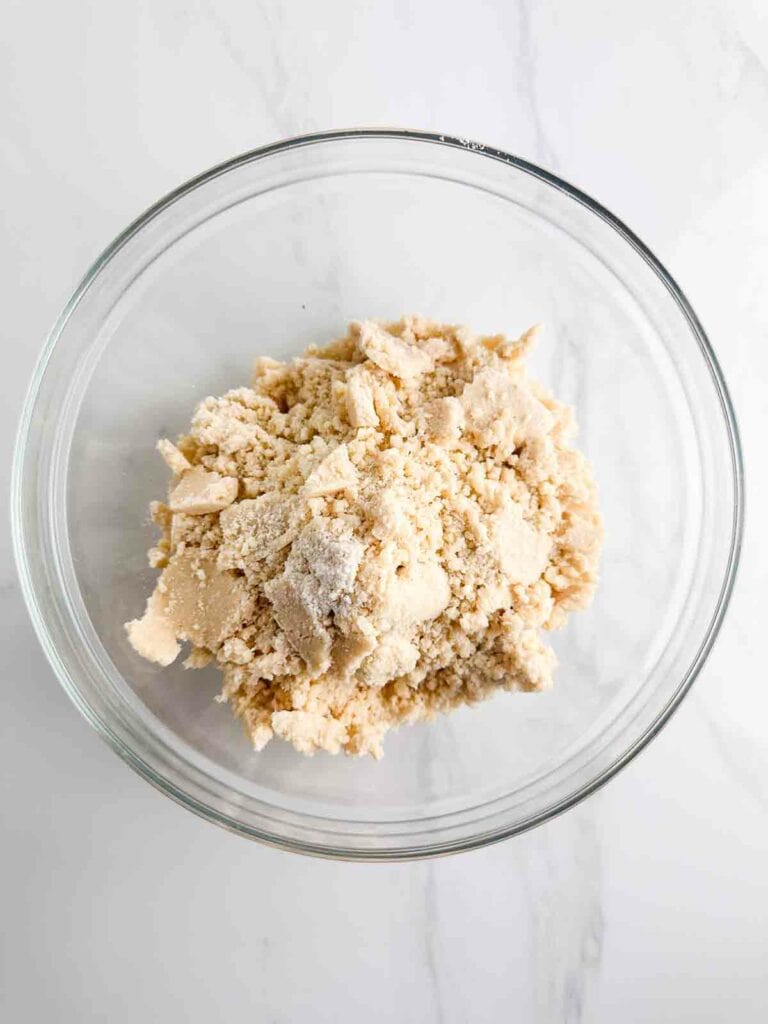
The pie crust dough will be in buttery clumps that you could press together though it would be very dry and crumbly.
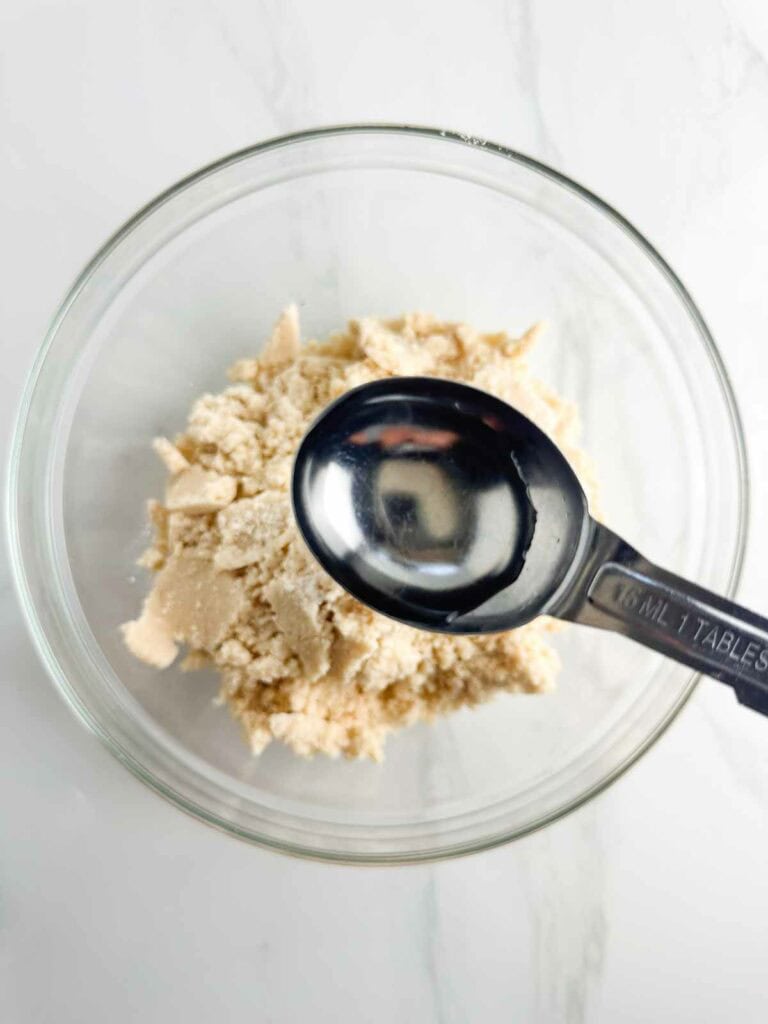
Sprinkle on about 4 tablespoons of water over it and use a rubber spatula to press the dough together.
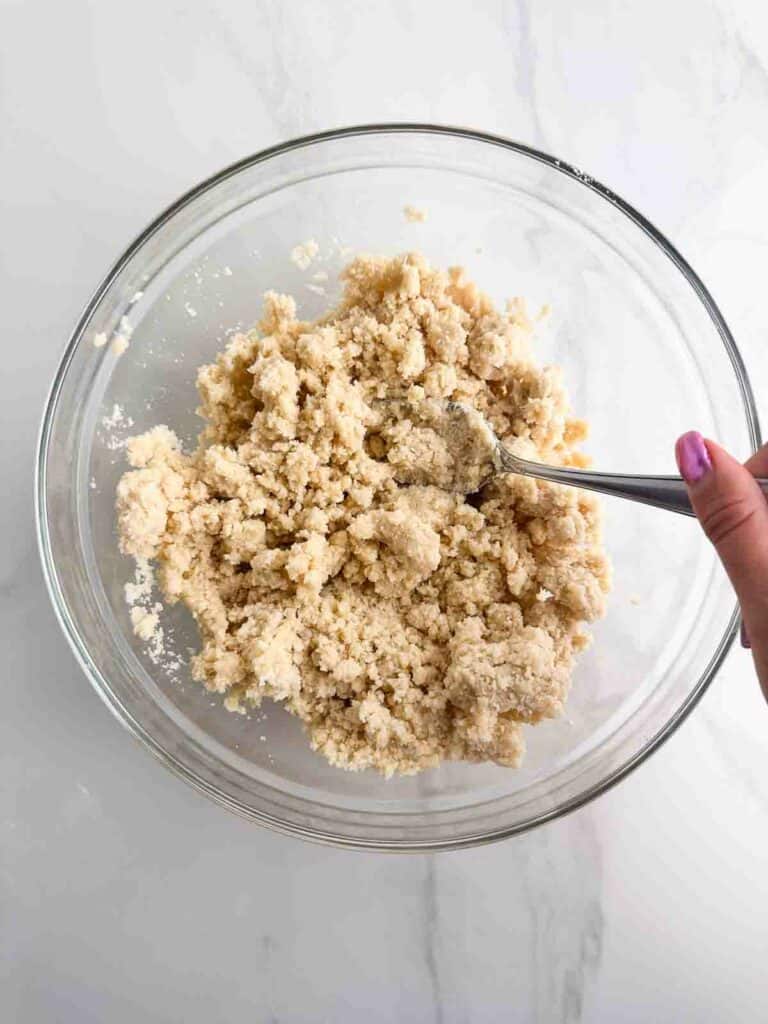
You will notice the dough starts to form larger clusters.
At this point, you will need to test the dough to see if it needs more water.
To do this, pinch a small amount of dough together.
If it holds together, the pie crust dough is ready.
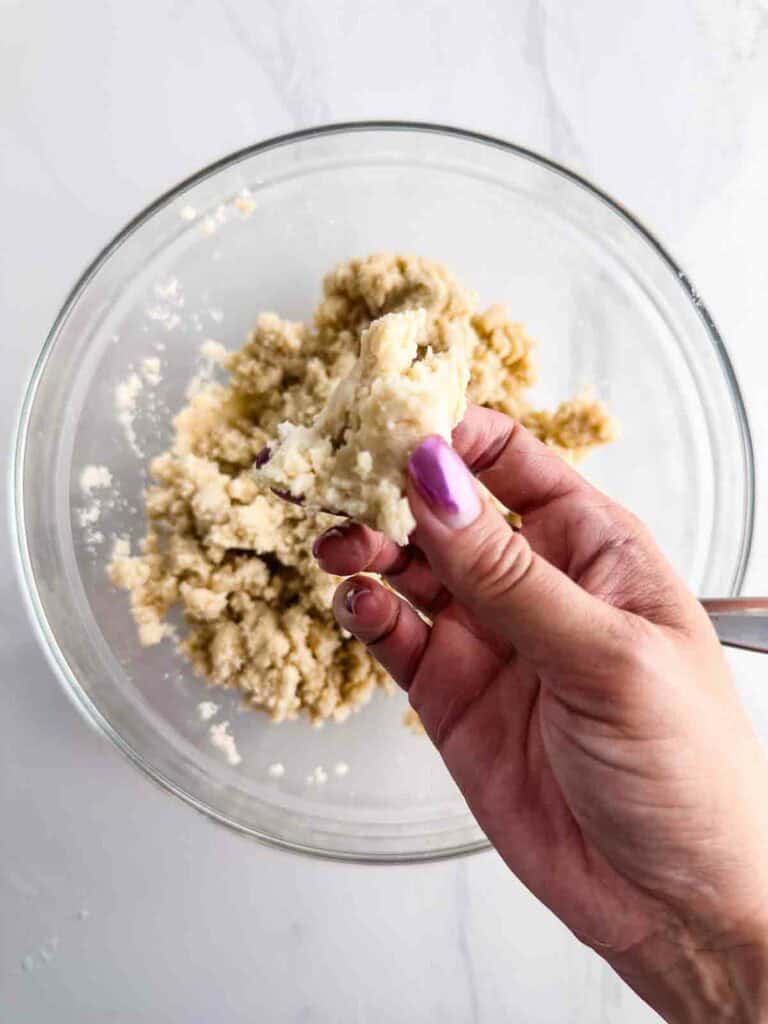
But if it falls apart, add another tablespoon to the dough and press it into the dough.
After each tablespoon added, continue with the same test.
Humidity can affect how much water your dough needs.
The more humid your air, the less water you’ll need.
In drier environments, you might need more water and that’s fine.
4. Form and chill.
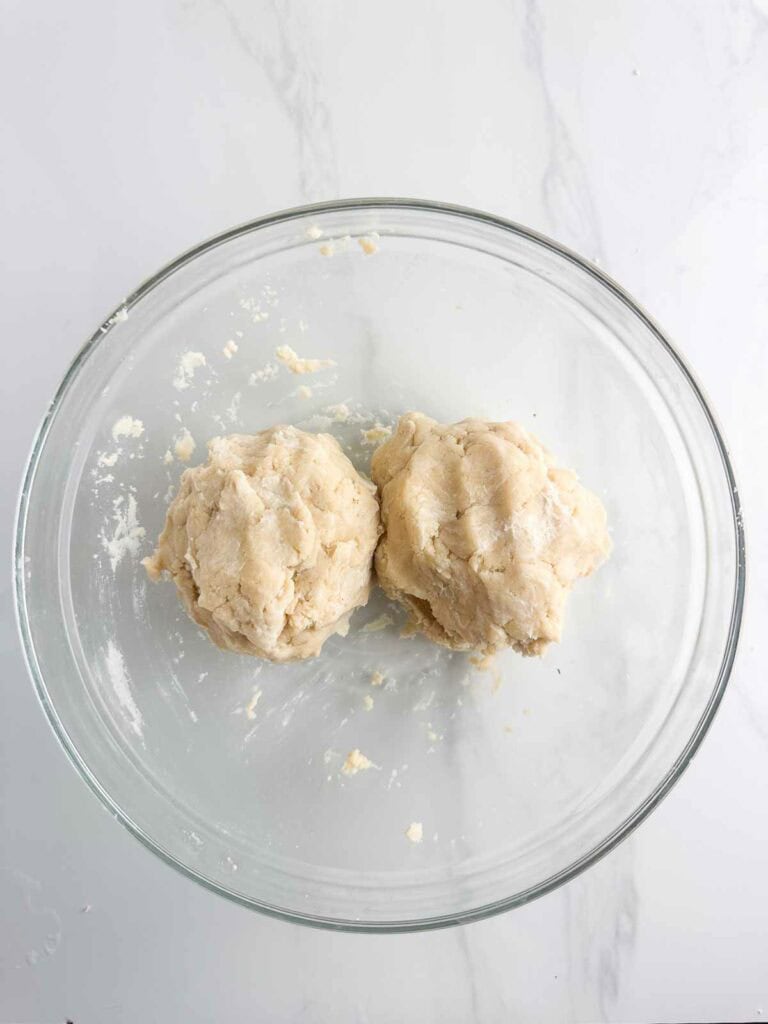
Take the dough out of the bowl and gently form it into a ball on a clean surface in your kitchen.
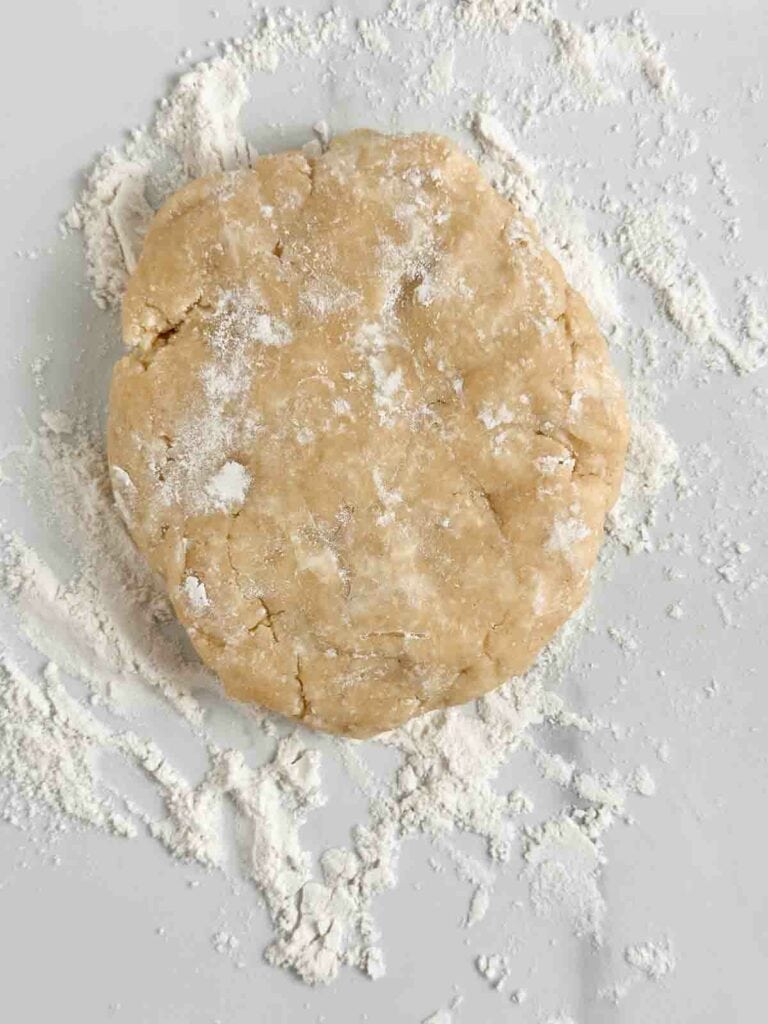
Cut the ball in half and then flatten each half into roughly equal sized disks.
Wrap each disk tightly in plastic wrap or place in an sealable bag, pushing out any excess air before sealing.
You need to store the dough for at least an hour in the fridge before using to make your favorite pies, appetizers, and tasty treats.
Pie Crust without a Food Processor
1. Combine the butter with first portion of dry ingredients.
Add 1.5 cups of flour, sugar, and salt to a medium mixing bowl.
Whisk to combine before scattering cold butter cubes over the flour mixture.
Quickly mix with a fork or whisk to coat each cube of butter with flour.
Use a pastry blender, potato masher, or other similar tool to cut the butter into the flour until it has a coarse texture simillar to breadcrumbs.
It will take about 1 to 3 minutes of working the dough to get to this point.
2. Add in the rest of the flour.
Scatter the remaining cup of flour over the butter and flour mixture.
Using your pastry blender or other tool, continue to work the dough mixture for about 20 seconds or until the flour is evenly distributed.
The dough should look crumbly with some small, pearl-sized pieces of butter still visible.
3. Add water and bring the dough together.
Transfer the dough mixture to a medium bowl.
Sprinkle about 4 tablespoons of ice water over it and then use a rubber spatula to press the dough back into itself.
The crumbs should start to form into larger clusters.
To check if it’s ready, pinch a small amount of dough together.
If it holds together, it’s good to go.
If it falls apart, add two or more tablespoons of water and continue to press until the dough comes together and holds its shape.
The amount of water needed depends on the level of humidity in your kitchen.
Don’t worry if you need to add more, particularly if you are in a dry environment.
4. Form and chill the dough.
Remove the dough from the bowl and gently form it into a ball on a clean surface.
Cut the ball in half, then flatten each half into a rough disk.
Wrap each disk tightly in plastic wrap or in a large, sealable bag making sure to push out any excess air from the bag before sealing.
Refrigerate for at least 1 hour before using in your favorite pies or other treats.
How to Roll Out Homemade Pie Dough
No matter which method you use to make the dough, after it is chilled and cold, you’re ready to roll it out.
1. Prepare the dough.
Remove one of the dough from the refrigerator and let it sit at room temperature for 5 minutes.
The rest time helps to make the dough softer and easier to roll though you don’t want it to sit for too long.
Lightly flour your work surface, the top of the dough, and your rolling pin.
We find that even if using a “non-stick” rolling pin, you will want to lightly flour it to help prevent it from sticking to the dough.
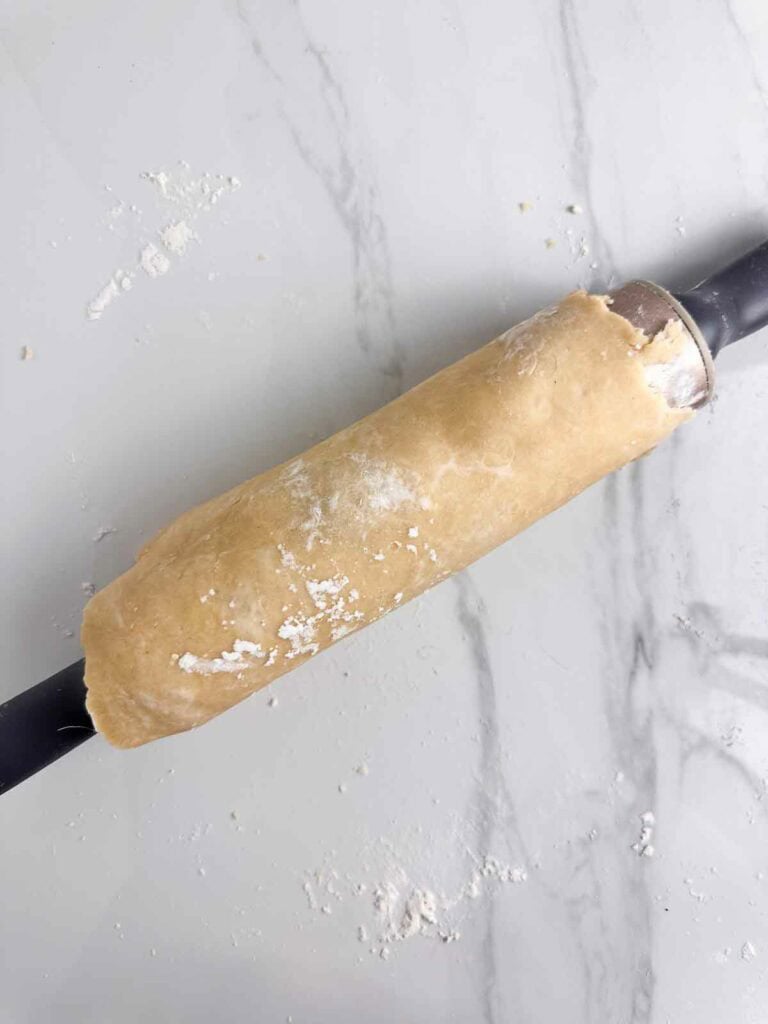
2. Roll the dough.
Using your rolling pin, roll it over the dough.
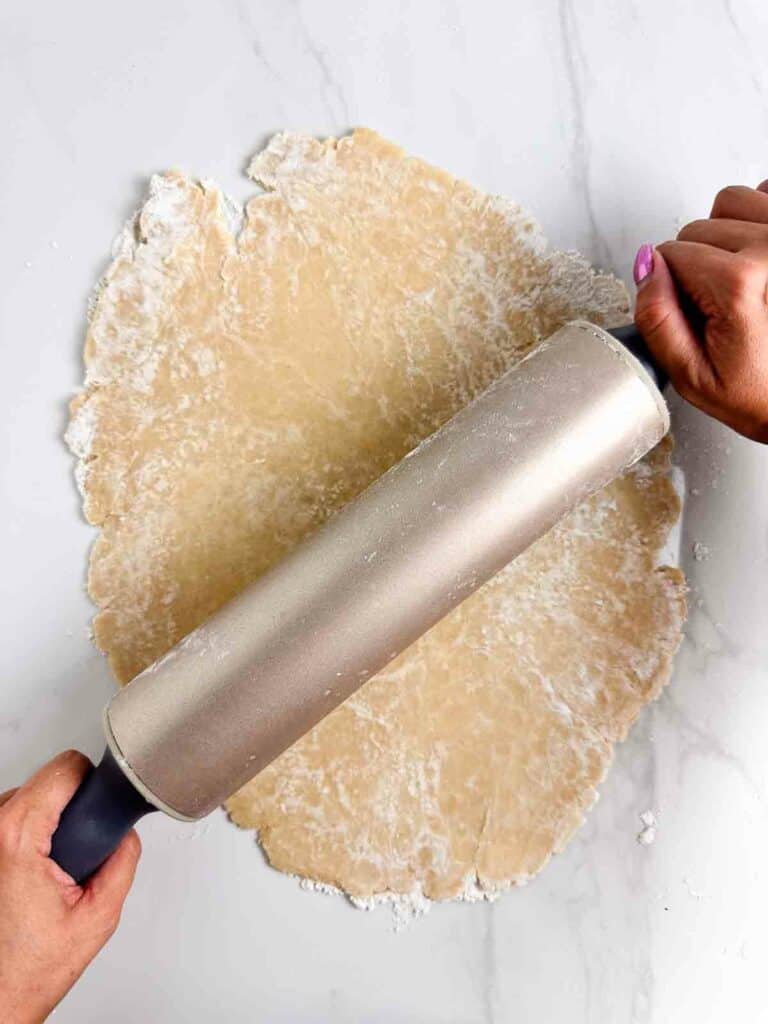
Turn it a quarter turn after every other roll until you have a circle about 12 inches in diameter.
A 12 inch rolled out dough is perfect for a 9-inch pie dish, which is pretty standard size.
You can check your progress by holding the pin dish inverted over top – there should be about a 1 to 2 inch edge all the way around.
As you roll, periodically check to make sure the dough isn’t sticking to your work surface.
As needed, add a small amount of flour underneath the dough as you roll.
3. Transfer to the pie dish.
To move the dough to your pie dish, carefully roll it around your rolling pin, then unroll it over the dish.
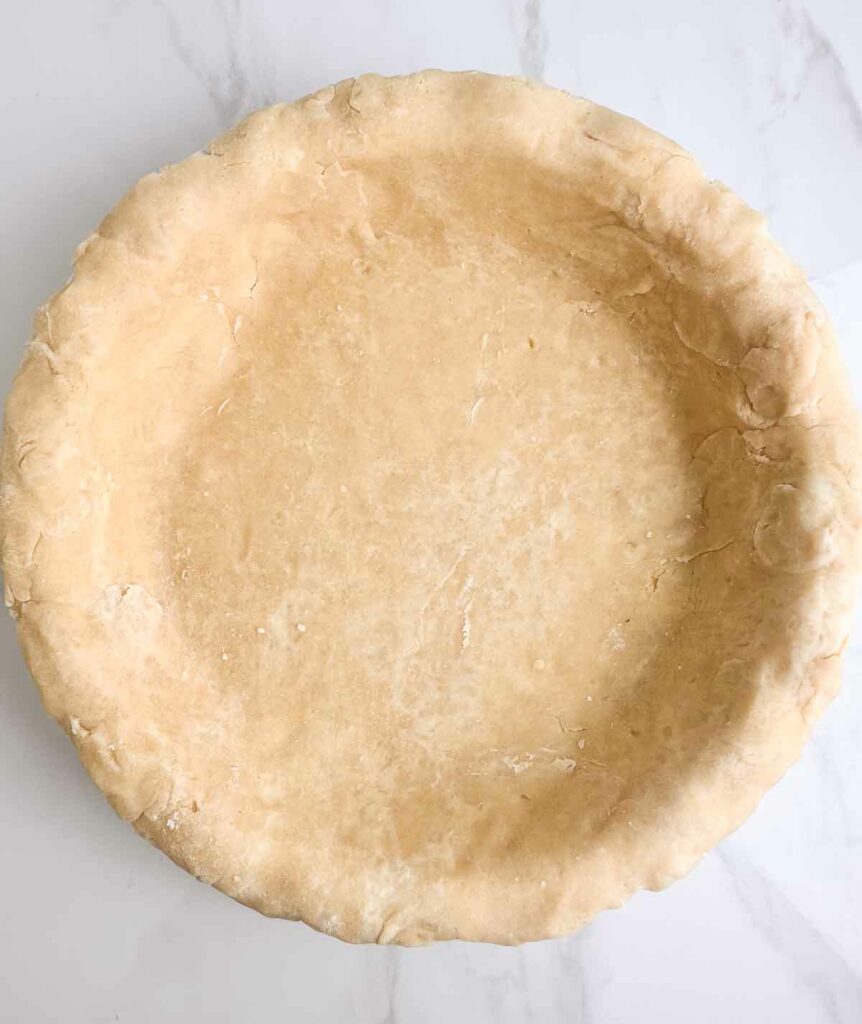
Gently press the dough down into the dish, making sure it lines the bottom and sides without pulling or stretching it.
4. Crimp the edges.
Fold any overlapping dough underneath itself to create a thicker, 1/4-inch border that rests on the lip of the dish.
To crimp, press your pointer finger of one hand against the inside of the dough while gently pressing with the knuckles of your other hand from the outside.
5. For a double-crust pie, don’t crimp the bottom crust.
Instead, roll out your second dough disk, fill the pie, then place the top crust over the filling.
Trim the edges of both crusts and then crimp them together as described above.
6. Chill the crust.
Slide the unbaked pie crust into the refrigerator and chill for at least 30 minutes.
How to Blind Bake Pie Crust for Single Crust Pies
1. Bake the crust – first phase.
First, preheat your oven while the unbaked pie crust is chilling to 375°F (190°C).
Pierce the bottom of the chilled crust all over with a fork.
Crumple up a sheet of parchment paper in your hands, then uncrumple it and use it to line the crust.
Fill with pie weights, dried rice, or dried beans to simulate a filling and prevent it from bubbling up as it bakes.
Bake for 15 minutes.
This is where you stop for a partially-baked crust, which you use in recipes that will bake the pie with a filling later.
2. Bake the crust – second phase.
For a fully baked pie crust, carefully remove the crust from the oven and lift out the parchment paper and weights.
Return the crust to the oven and continue to bake until it is light golden brown or about 15 to 20 minutes more.
Set aside the fully baked crust so that it can cool completely before filling.
3. Optional shiny, golden crust.
For a shiny, golden finish, prepare an egg wash by whisking one egg yolk and 1 tablespoon of water and creaming together.
Lightly brush the bottom and sides of the crust, then bake for another 5 to 8 minutes or until the crust is dry and shiny.
Allow the crust to cool completely before filling.
How to Make a Double Crust Pie
Before getting stated, keep in mind oven temperatures and bake times will vary based on the recipe you are following.
You should always refer to the recipe you are following to get the right baking temp.
Here are the general steps to make a double crust pie.
1. Add the top crust.
Roll the bottom crust out and place it into your pie dish as directed above.
Add your filling to the bottom pie crust.
Next, roll out the second dough disk and place it over the filled pie.
Use a knife or kitchen scissors to trim the dough so that it overhangs the edge of the dish by about 3/4-inch.
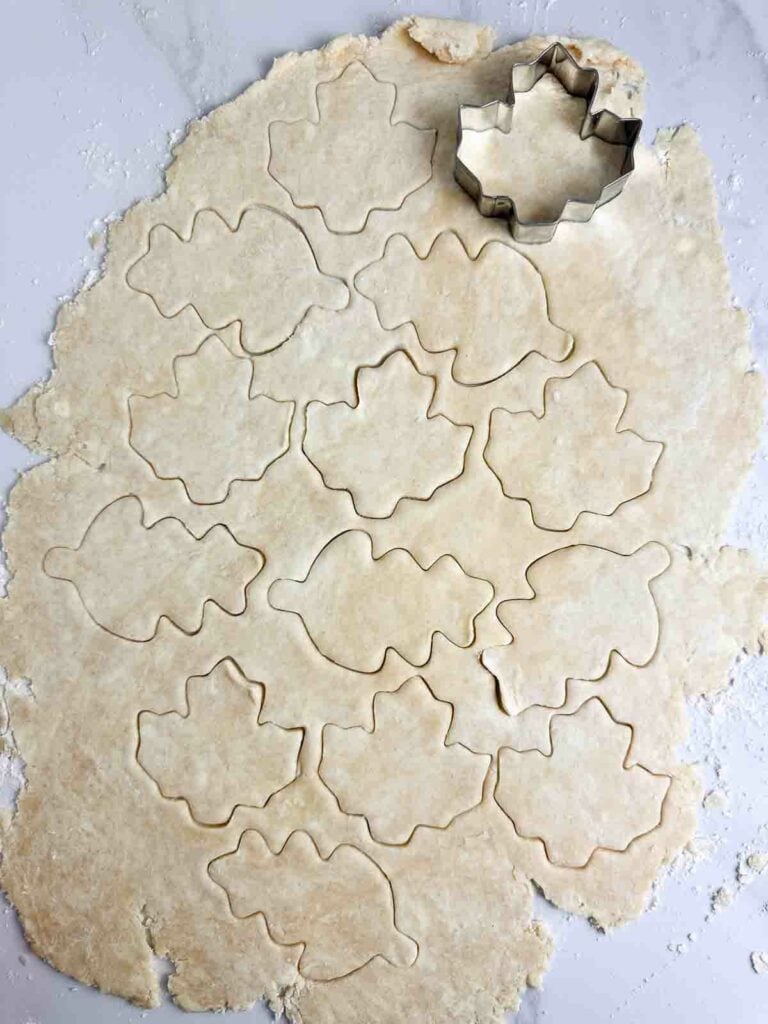
Or for extra credit, you can do things like make a lattice top crust or layer on pieces of pie crust you have cut out with a cookie cutter.
2. Seal and crimp the edges.
Fold the edges of the top crust underneath the edges of the bottom crust, pressing to seal them together and create a thicker border that rests on the lip of the dish.
Crimp the edges as desired.
Refrigerate the pie for at least 30 minutes before baking.
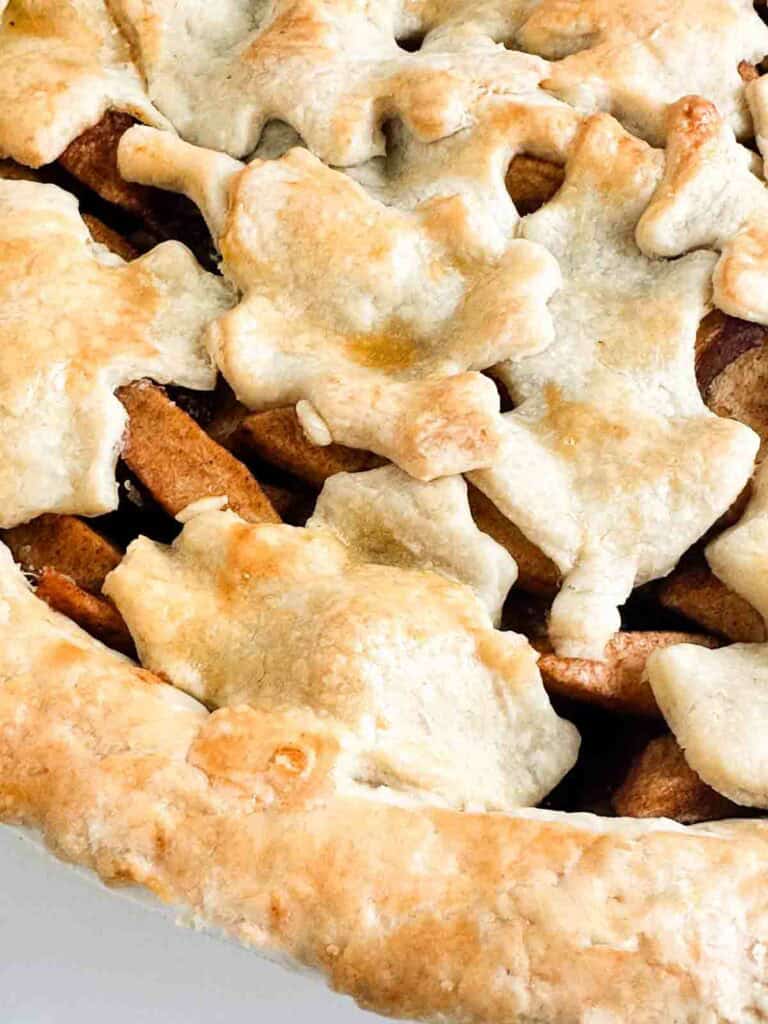
3. Finish and bake the pie.
Just before baking, make an egg wash by whisking an egg yolk and one tablespoon of water together.
Use a pastry brush to coat the top crust lightly, then sprinkle with about 1 tablespoon of sugar.
Before placing in the oven, cut 3 to 4 slits in the top of the pie to vent steam.
Bake as directed by your recipe.
Serving
No matter what you do, please serve the pie crust recipe as part of another recipe.
Raw pie crust is just gross.
You can use this pie crust recipe for all sorts of pies and other dishes, like:
- apple pie
- pumpkin pie
- pumpkin hand pies
- quiches
- chocolate caramel pecan pie
- blueberry pie
- cocktail weiners
- homemade pop tarts
- mini chicken pot pies
Storing
You need to store the pie crust for at least 1 hour before rolling it out and using in any recipe.
It should stay fresh in the fridge, unbaked for up to 3 days if it is tightly wrapped in plastic wrap.
You can freeze raw pie crust for up to 3 months as long as you wrapped it tightly.
When you are ready to make the pie with frozen crust, remove from the freezer and allow to thaw in the fridge.
Tips and Tricks
- Using a food processor is not required, but it does make it easier to mix the pie crust dough. If you prefer or don’t have a food processor, you can do it all by hand.
- An egg wash is not required, but it does add a bit of a golden-brown color to the pie crust when it is done baking.
- When baking this pie crust recipe as part of a pie recipe, make sure to follow the baking instructions for the pie you are trying to make.
- If you are making a savory pie like chicken pot, you can skip the sugar.
- COLD is the name of the game when working with pie crust. You want all the ingredients chilled and to chill the crust before baking it. This will help little steam pockets develop in your dough that lead to flakiness.
- Don’t overwork your crust. If you find yourself rolling out your crust over and over, you’ll notice the crust will get tough and seize up. This happens because the glutens get over developed in the crust, causing it to be tough.
Did you make this? Let me know!
Did you make our homemade pie crust recipe or any other recipe on my site? Leave me a comment below and let me know how you liked it. And make sure you follow along with me on Facebook, Pinterest and Instagram to see everything we’ve got going on.
Equipment
- 1 Food processor
- 1 Pastry cutter (If not using a food processor)
Ingredients
- 2.5 cups flour
- 1 cup butter (2 sticks)
- 1/2 teaspoon salt
- 2 teaspoons sugar
- 6 tablespoons ice water (may need a little more or less)
Instructions
- Add 1.5 cups of flour, sugar, and salt to the food processor and pulse a few times to combine.
- Cube up cold butter and scatter it across the top of the flour mixture.
- Process for about 15 to 20 seconds or until the flour and butter start to form a paste or dough.
- There should not be any dry, uncovered flour left in the bottom when it is ready. You should notice that the flour has a pale yellow color and should press together easily.
- Use a spatula to scrap down the sides of the food processor bowl.
- Add in the remaining cup of flour and pulse about 4 to 5 times or until the dough breaks up and feels crumbly. The flour should be pretty evenly distributed at this point.
- Remove the pie dough from the food processor and place it in a medium mixing bowl. Sprinkle on about 4 tablespoons of water over it and use a rubber spatula to press the dough together.
- You will notice the dough starts to form larger clusters. At this point, you will need to test the dough to see if it needs more water. To do this, pinch a small amount of dough together. If it holds together, the pie crust dough is ready. But if it falls apart, add another tablespoon to the dough and press it into the dough.
- Add additional tablespoons of water, blending it in, and testing the dough until it is ready.
- Take the dough out of the bowl and gently form it into a ball on a clean surface in your kitchen.
- Cut the ball in half and then flatten each half into roughly equal sized disks.
- Wrap each disk tightly in plastic wrap or place in an sealable bag, pushing out any excess air before sealing. You need to store the dough for at least an hour in the fridge before using to make your favorite pies, appetizers, and tasty treats.