Homemade Christmas Tree Chocolate Candy
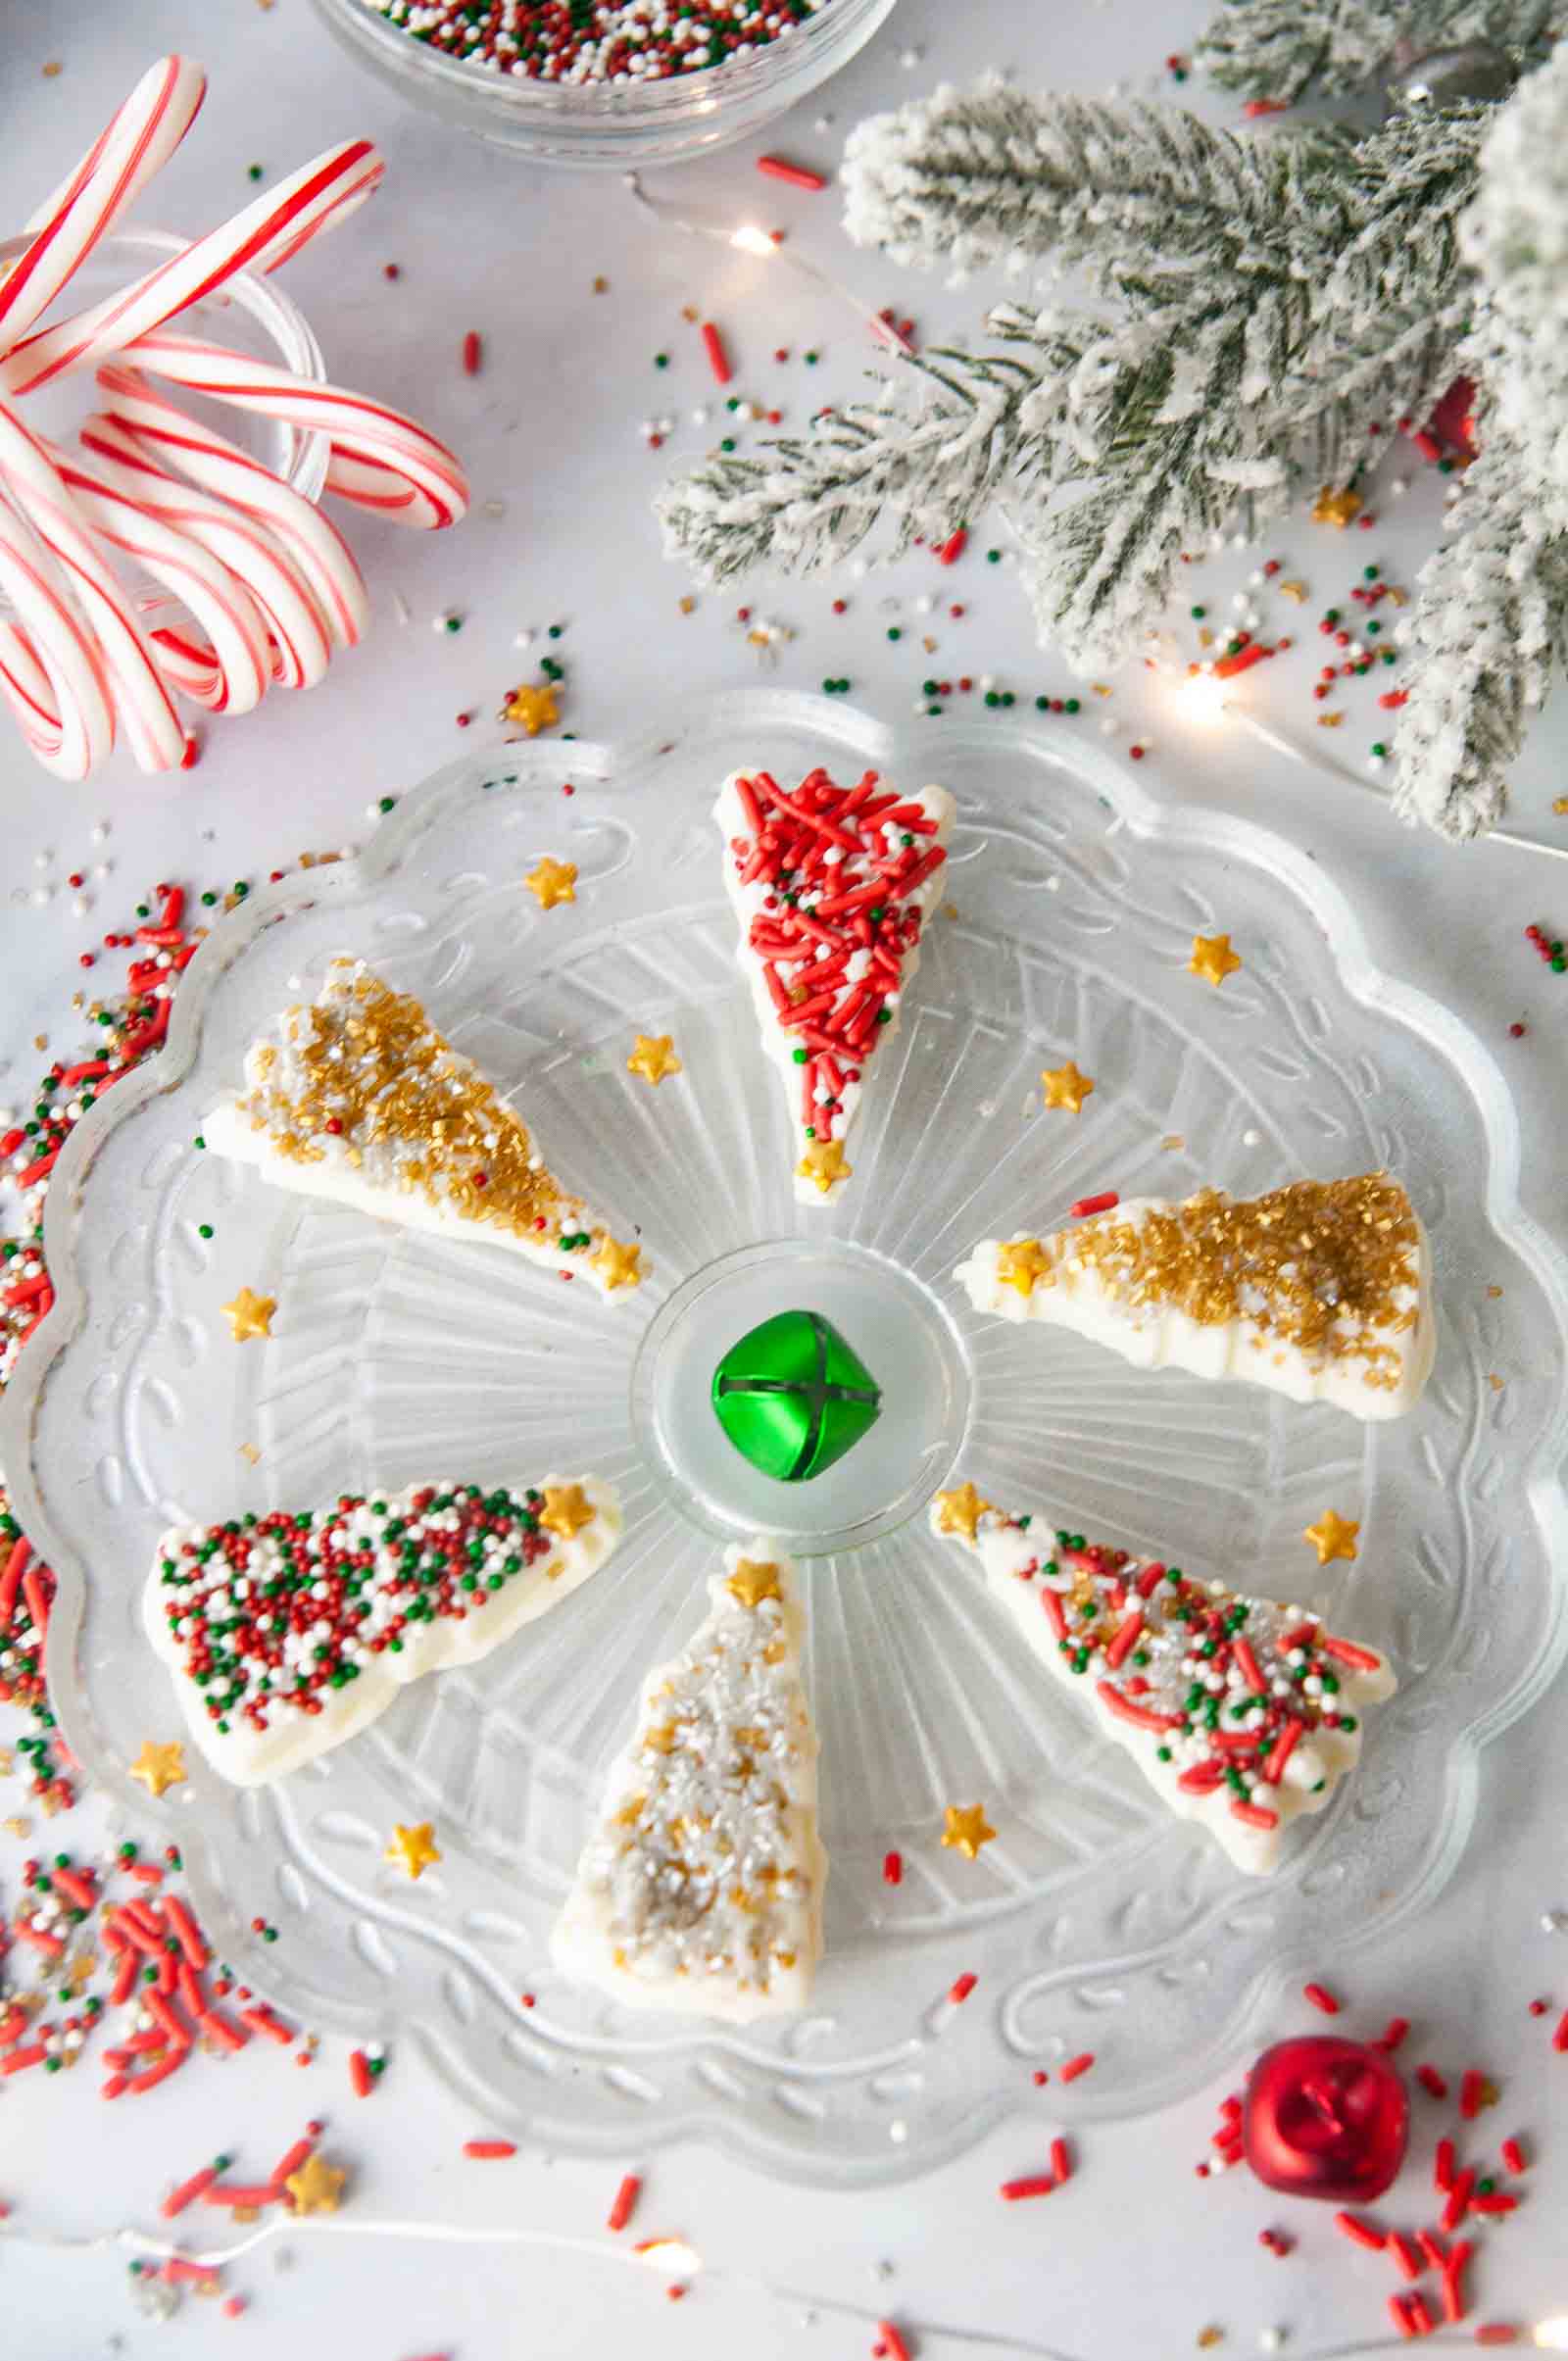
Homemade Christmas tree chocolate candy are an easy, festive holiday candy you can make at home. Fun to make with kids, these candies make cute gifts or look adorable as part of a holiday dessert spread. Learn how to make chocolate Christmas trees and enjoy them this season!

Post may contain affiliate links. As a member of the Amazon affiliate program, I may earn a small commision from qualifying purchases. To read my affiliate policy, click here.
There’s nothing that I enjoy more than getting creative and a bit messy in the kitchen with my kids.
Especially my daughter. She’s a girl after my own heart and loves to play around in the kitchen too.
That goes times two when sweets are involved.
She had a blast helping me put together these festive Christmas tree chocolates.
At 7, she could make these with minimal help and really take creative control of the project.
You can also do this with younger kiddos too, but you’ll probably need to help them more.
My 3 year old son likes to get in on the kitchen action and stir the melted candy.
He also loves to add sprinkles, steal chocolate chips, and of course eat the candy when it’s done.
And I can’t say I blame him!
These festive treats are yummy and a fun addition to any cookie tray or food gift to share.
Ingredients and Materials

To make these easy candies, you’ll need:
- Chocolate chips– Use any kind of chocolate you like. We used white chocolate as per my daughter’s request, but they would be yummy with any. You could also use green candy melts if you prefer.
- Coconut oil– This is optional, but if you stir in a little coconut oil after your chocolate or candy is melted, it makes it a little easier to work with and creates a pretty shine.
- Sprinkles– Yet again, optional, but when it comes to the holidays the more sprinkles the better! I used these cute Wilton star sprinkles and these festive non pariel sprinkles along with some silver and gold sugar sprinkles.
You’ll also need some nonedible supplies like:
- Silicone Christmas tree candy molds– I love silicone molds. They are very easy to work with and they release the chocolate very easily. The one I have linked isn’t the one shown here but it is the closest I could find.
- A piping bag or plastic sandwich bags– It helps to if you fill the bags with the melted chocolate to pipe it into the molds.
- Microwave safe bowls– To melt the chocolate in
- a cookie sheet– I like to make candy on top of a cookie sheet so that it can collect the chocolate and the sprinkles and so I can bang the sheet with the mold on it against a table or a counter top to get out any air bubbles.
How to Make Chocolate Christmas Trees
1. Prepare the molds.

Cover the bottom of the molds in different kinds of festive sprinkles. Set them aside.
2. Melt the chocolate.

Put the chocolate in a microwave safe bowl. Microwave it for 30 seconds and then take it out of the microwave and
stir. Microwave for 15 seconds. Stir again. Repeat this until the chocolate is smooth. Stir in the coconut oil.
3. Spoon or pipe the chocolate into the sprinkled mold.

Fill a piping bag with the melted chocolate and snip off the tip. Pipe it into the molds. Once the molds are full, give the mold a few taps against the counter to release any air bubbles.
4. Let the candies set.

Let the chocolates set on your counter for 15 minutes or until firm. Once the chocolate is hard, carefully remove them from the molds. Enjoy!
How to Store Homemade Christmas Chocolate

When you are done making these homemade Christmas candies, store the set candies in an airtight container with layers of parchment paper or wax paper between the layers.
For added festive sparkle and cheer, you could use a cute tin and then they are ready for gifting too!
Should you refrigerate homemade Christmas chocolate?

No! Do not put your homemade chocolates in the fridge. They will get too hard! We’re talking break a tooth hard.
How far in advance can you make these Christmas tree chocolate candies?

Part of the beauty of making candy either to serve as part of a Christmas dessert spread or for gifting is you don’t have to make it the day you plan to serve or gift it. The candy should stay good for up to 3 weeks if you properly store it in an airtight container on your counter.
Tips and Tricks

- Use any kind of chocolate you like. These are fun with white chocolate as shown since they give you that snowy Christmas tree look, but will also work with whatever you have or like.
- It’s super important to cook the chocolate (or candy melts) slowly. After the initial 30 second increment, check the chocolate every 15 seconds and stir. Don’t skip this or you may burn your chocolate.
- The coconut oil isn’t absolutely necessary but it does make for a smoother candy when you are finished.
- Sprinkles aren’t absolutely necessary either but they are highly encouraged.
- Depending on your mold, the amount of candy you can make may vary.

Other Homemade Candy Recipes

I love making all kinds of homemade candy. If you do too, check out some of my other favorites:
- Homemade Chocolate Hearts
- No Bake Chocolate Peanut Butter Bars
- Easy Candy Cane Hearts
- Easy Cheese Plate with Sea Salt Chocolate Truffles
And don’t forget to check out Easy Cinnamon Roll Christmas Tree for Christmas Morning!
For a fun, festive treat, try these Santa Hat Brownies!

Ingredients
- 12 ounces of chocolate chips any variety
- 1 tbs coconut oil
- assorted sprinkles
Instructions
- Put sprinkles in the bottom of the molds.
- Melt the chocolate in the microwave. To do this, put the chocolate in a microwave safe bowl. Then microwave for 30 seconds. Stir and then microwave in 15 second increments, stirring after each one, just until the chocolate is smooth.
- Stir in coconut oil into the chocolate, stirring until the oil is fully melted into the chocolate.
- Either put the chocolate into a piping bag and pipe chocolate into the Christmas tree molds or spoon it into the molds.
- Once you’ve filled the molds with chocolate, put the molds onto a cookie sheet and rap the sheet on the counter to release any air bubbles in the chocolate.
- Let the chocolate set and harden. Release it from the molds. Enjoy!


